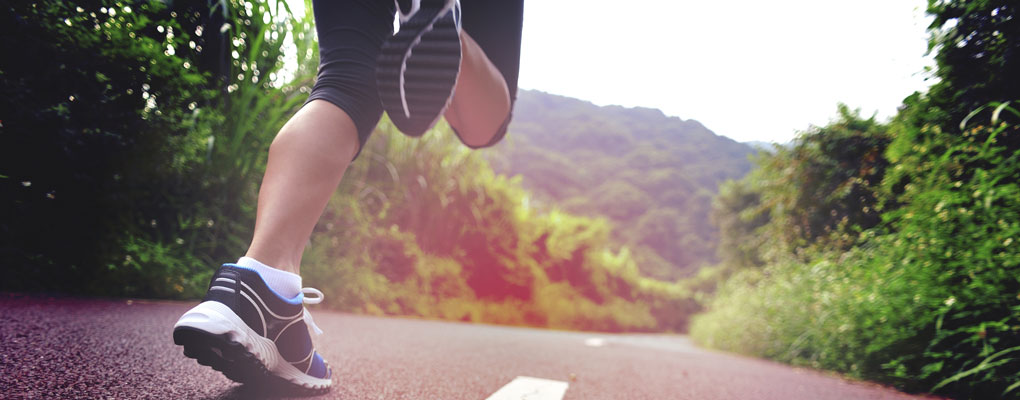
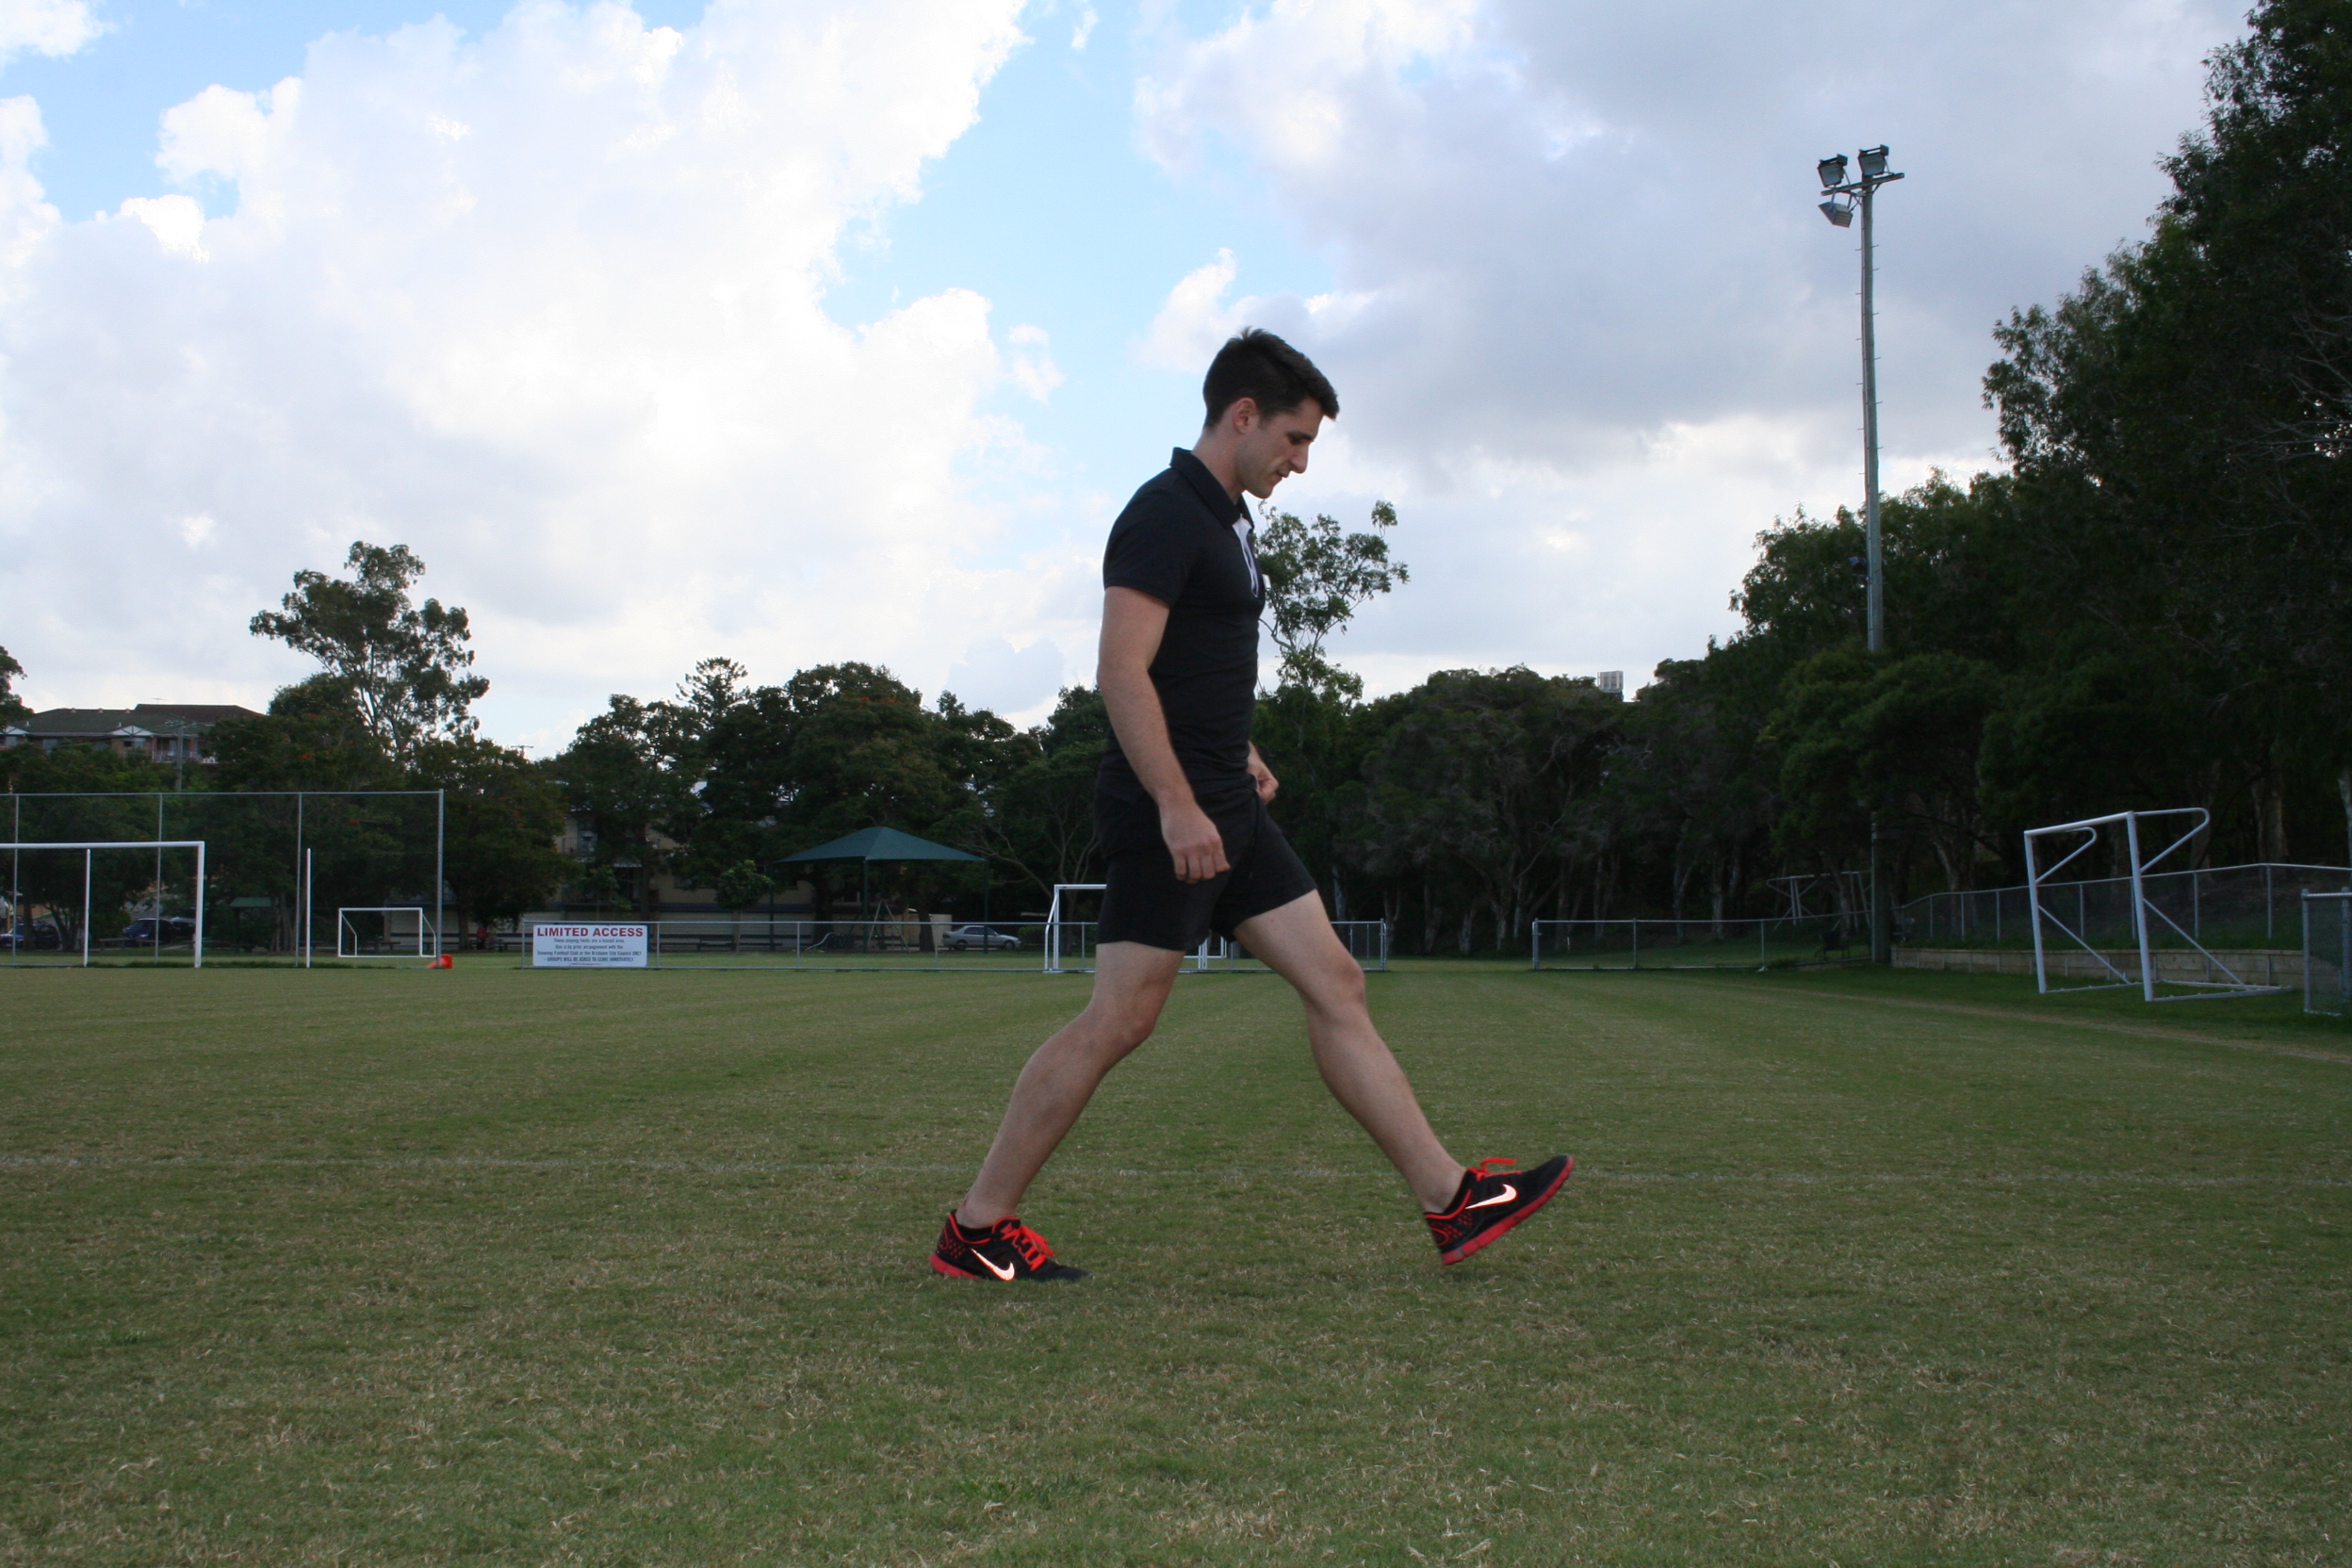
At Wesley LifeShape Clinic, we recommend that you walk in your fat burning heart rate zone, which means that you will be utilizing predominantly some of that energy that is stored as fat to fuel your exercise. This is important when you are on your weight loss journey. If you start to exercise at a higher intensity, you will start to burn less fat stores and more carbohydrate stores, which can lead to post exercise hunger – not the place we need you to be!
So if you are trying to lose some fat from your legs, you need to walk it off, literally! You can build muscle underneath fat and this will improve your leg shape as well as increase your metabolism. However, if you don’t use the fat first, then those lovely muscles will continue to be hidden.
A combination of cardio and resistance training is the key to tone muscles. Resistance training will increase the muscle mass and walking will decrease the fat mass, causing a healthy change in your body consumption and the key to changing your leg shape.
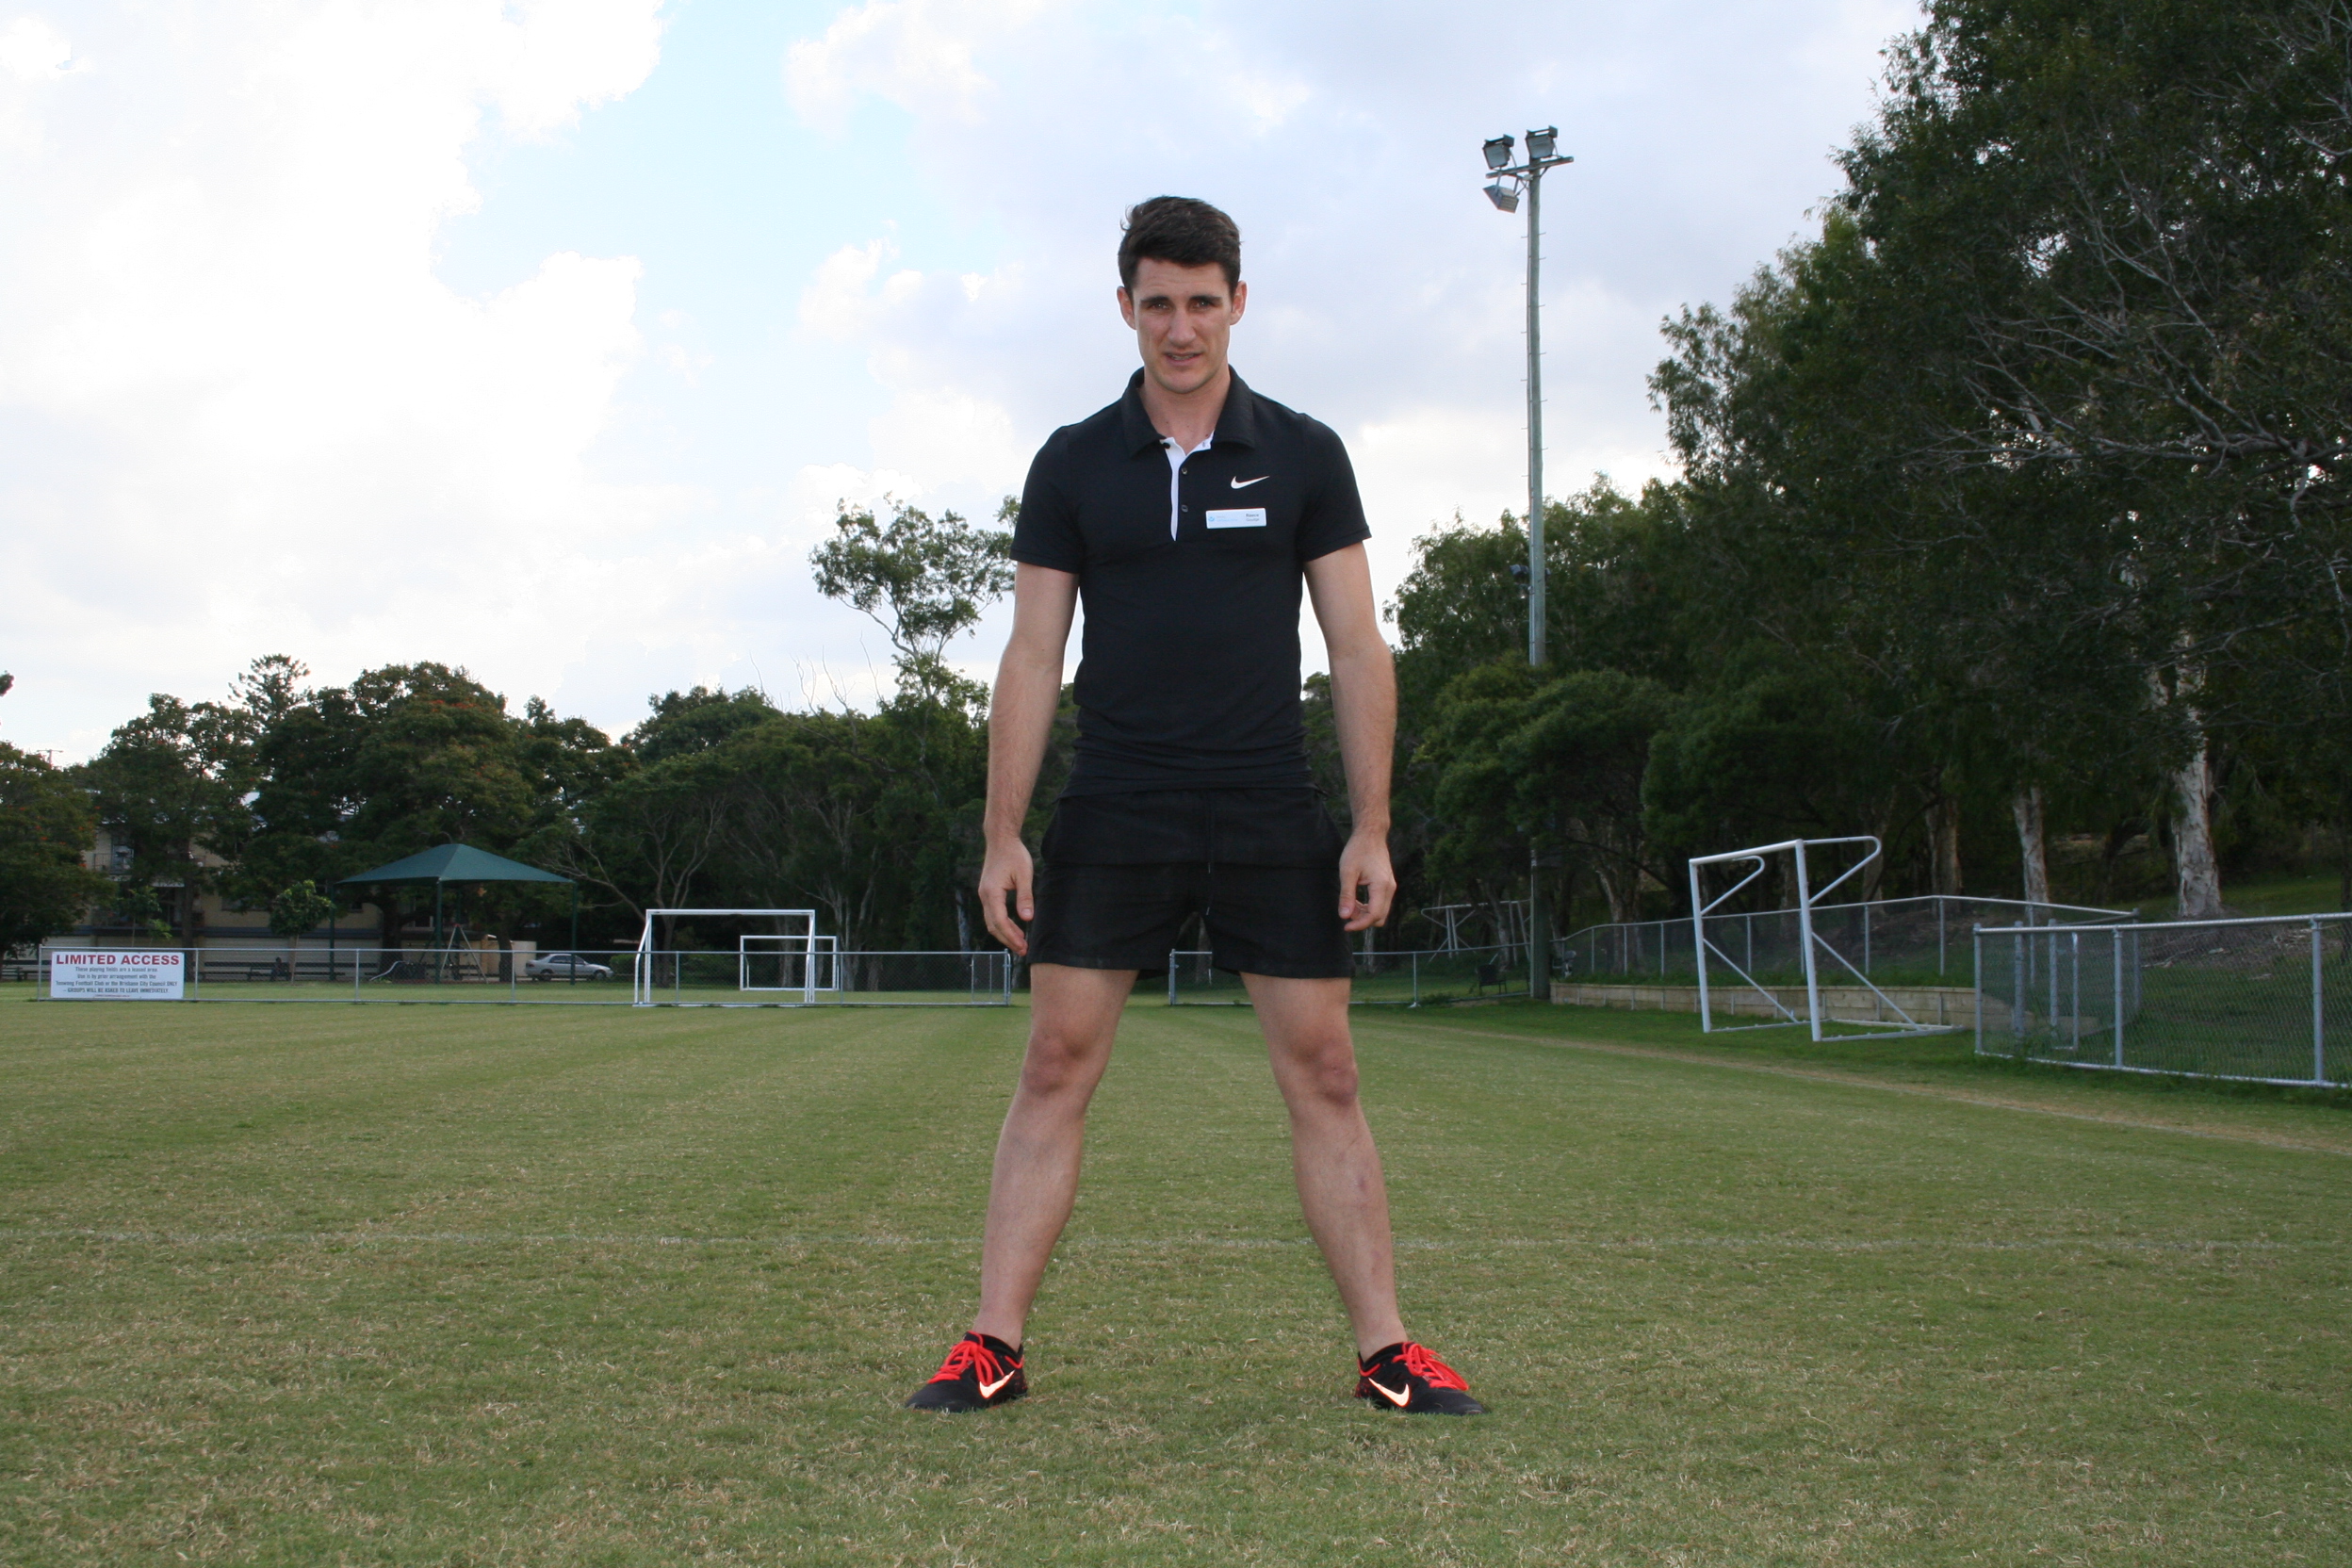
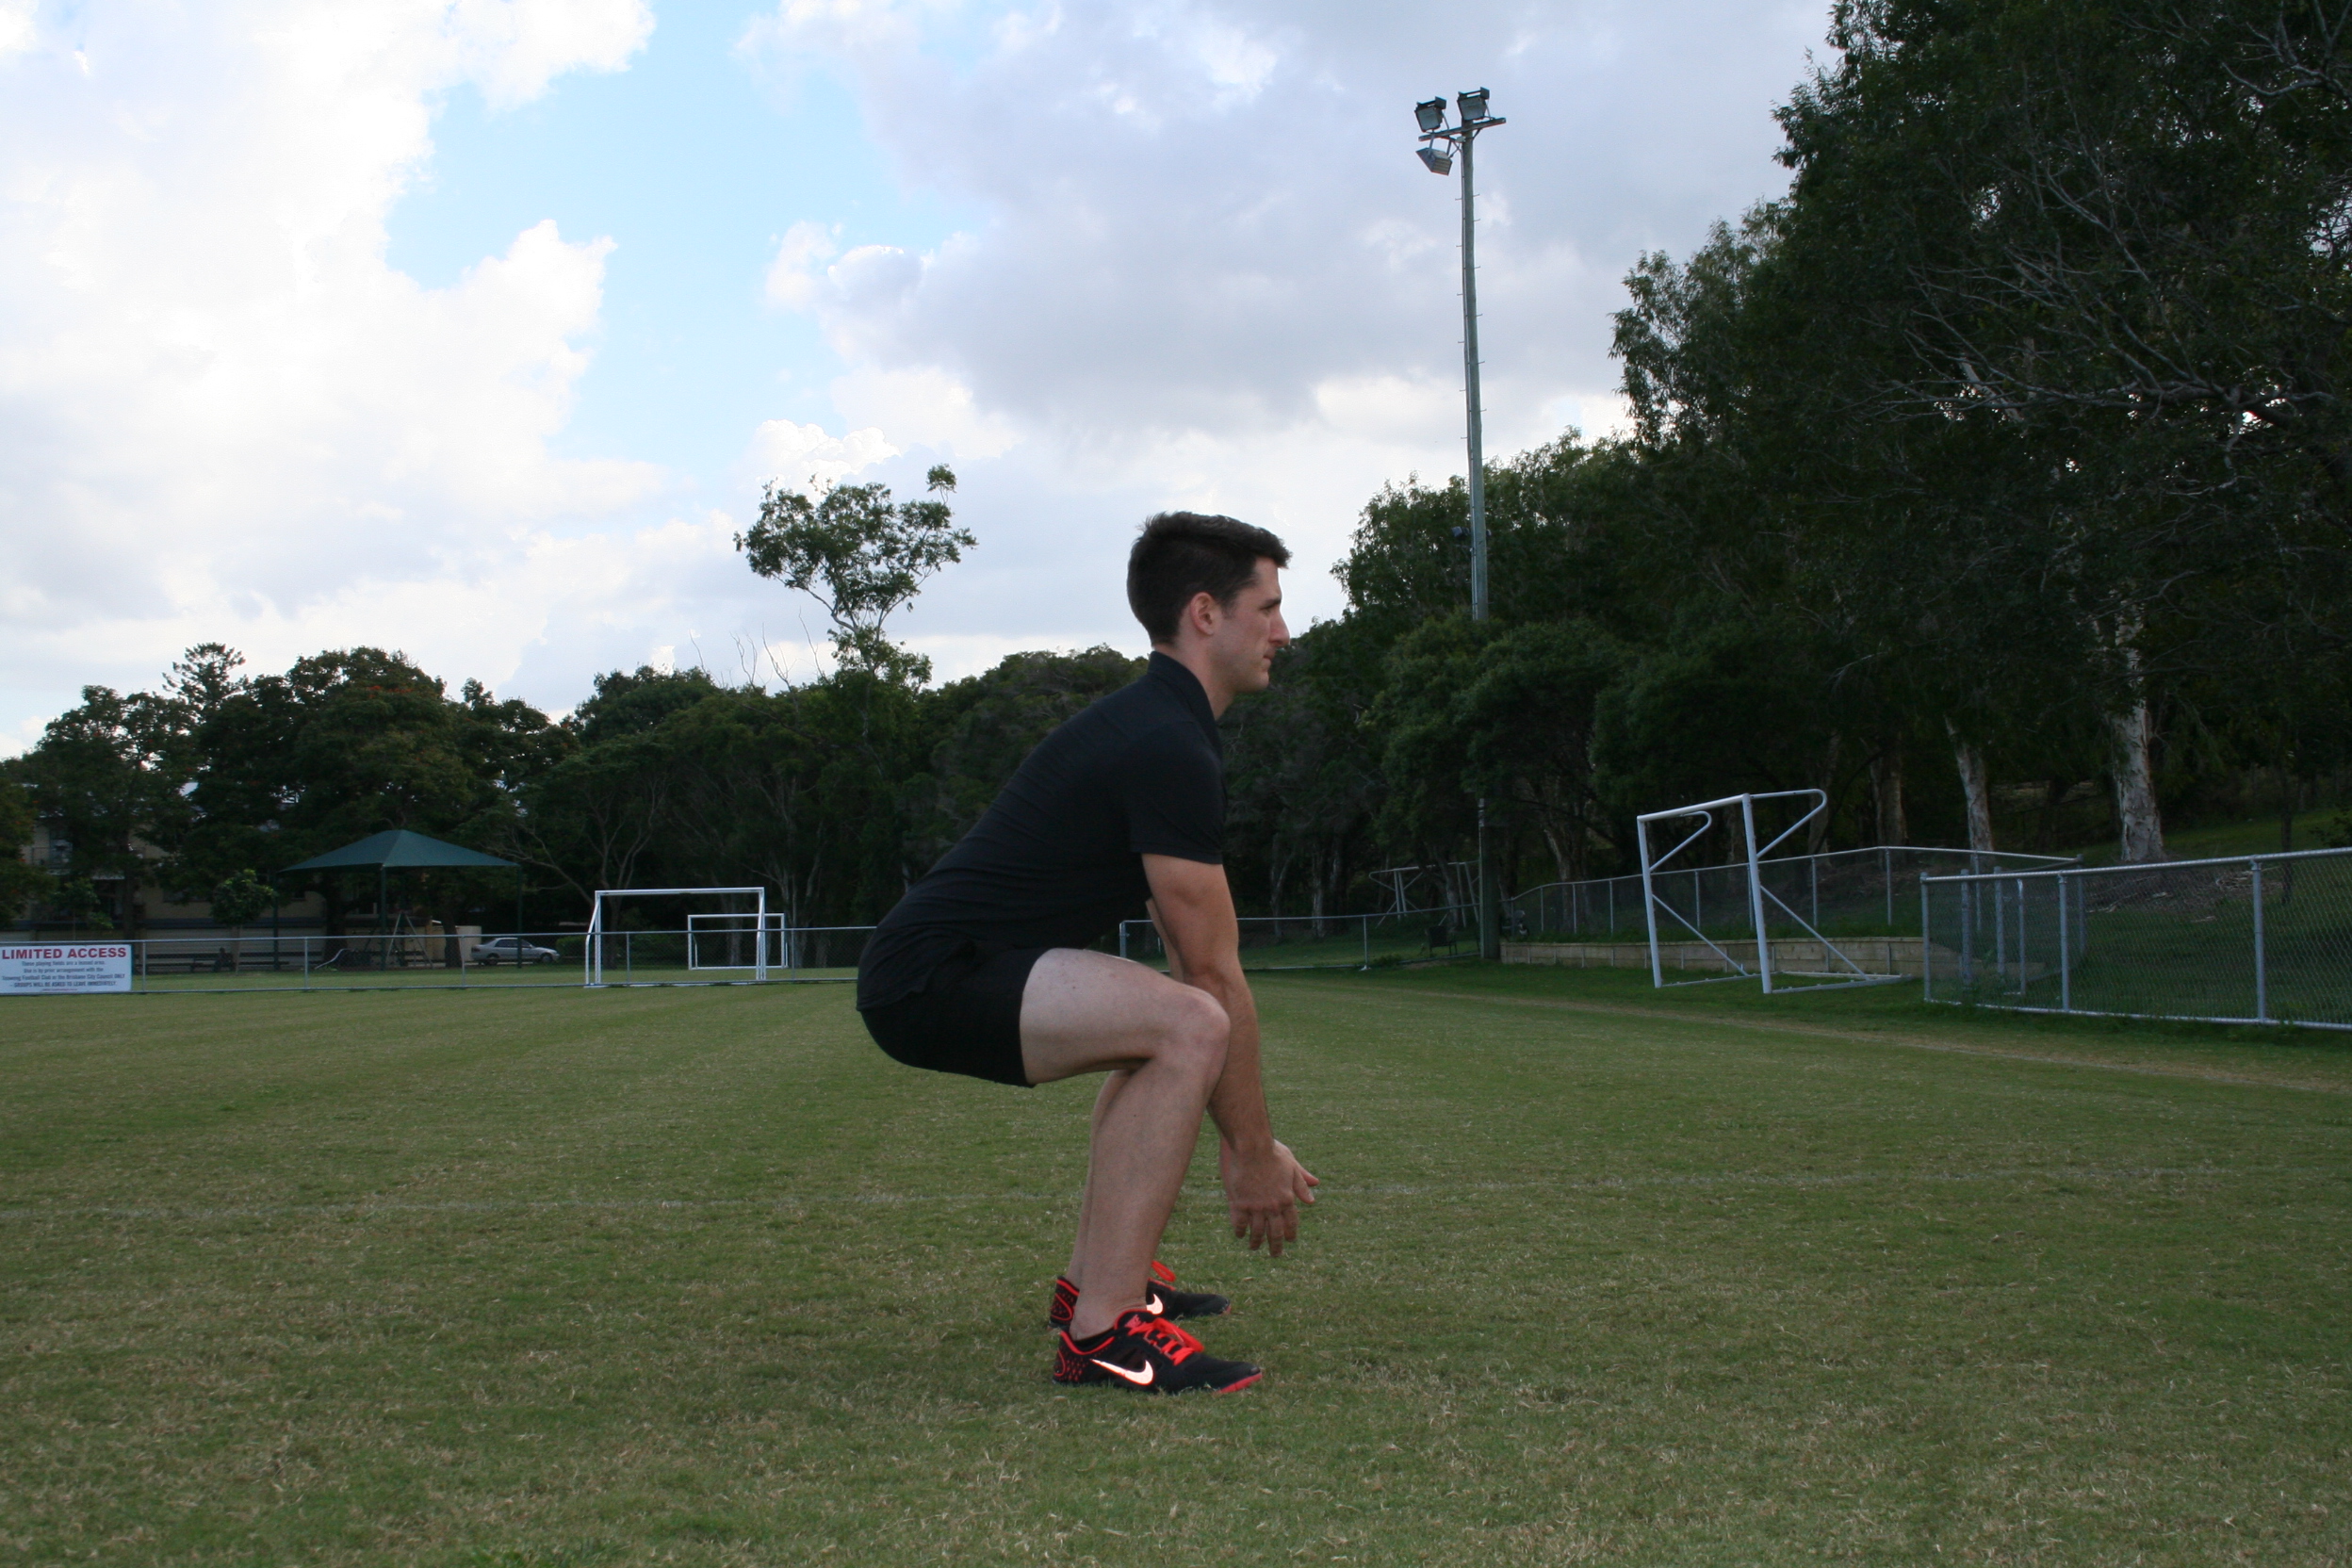
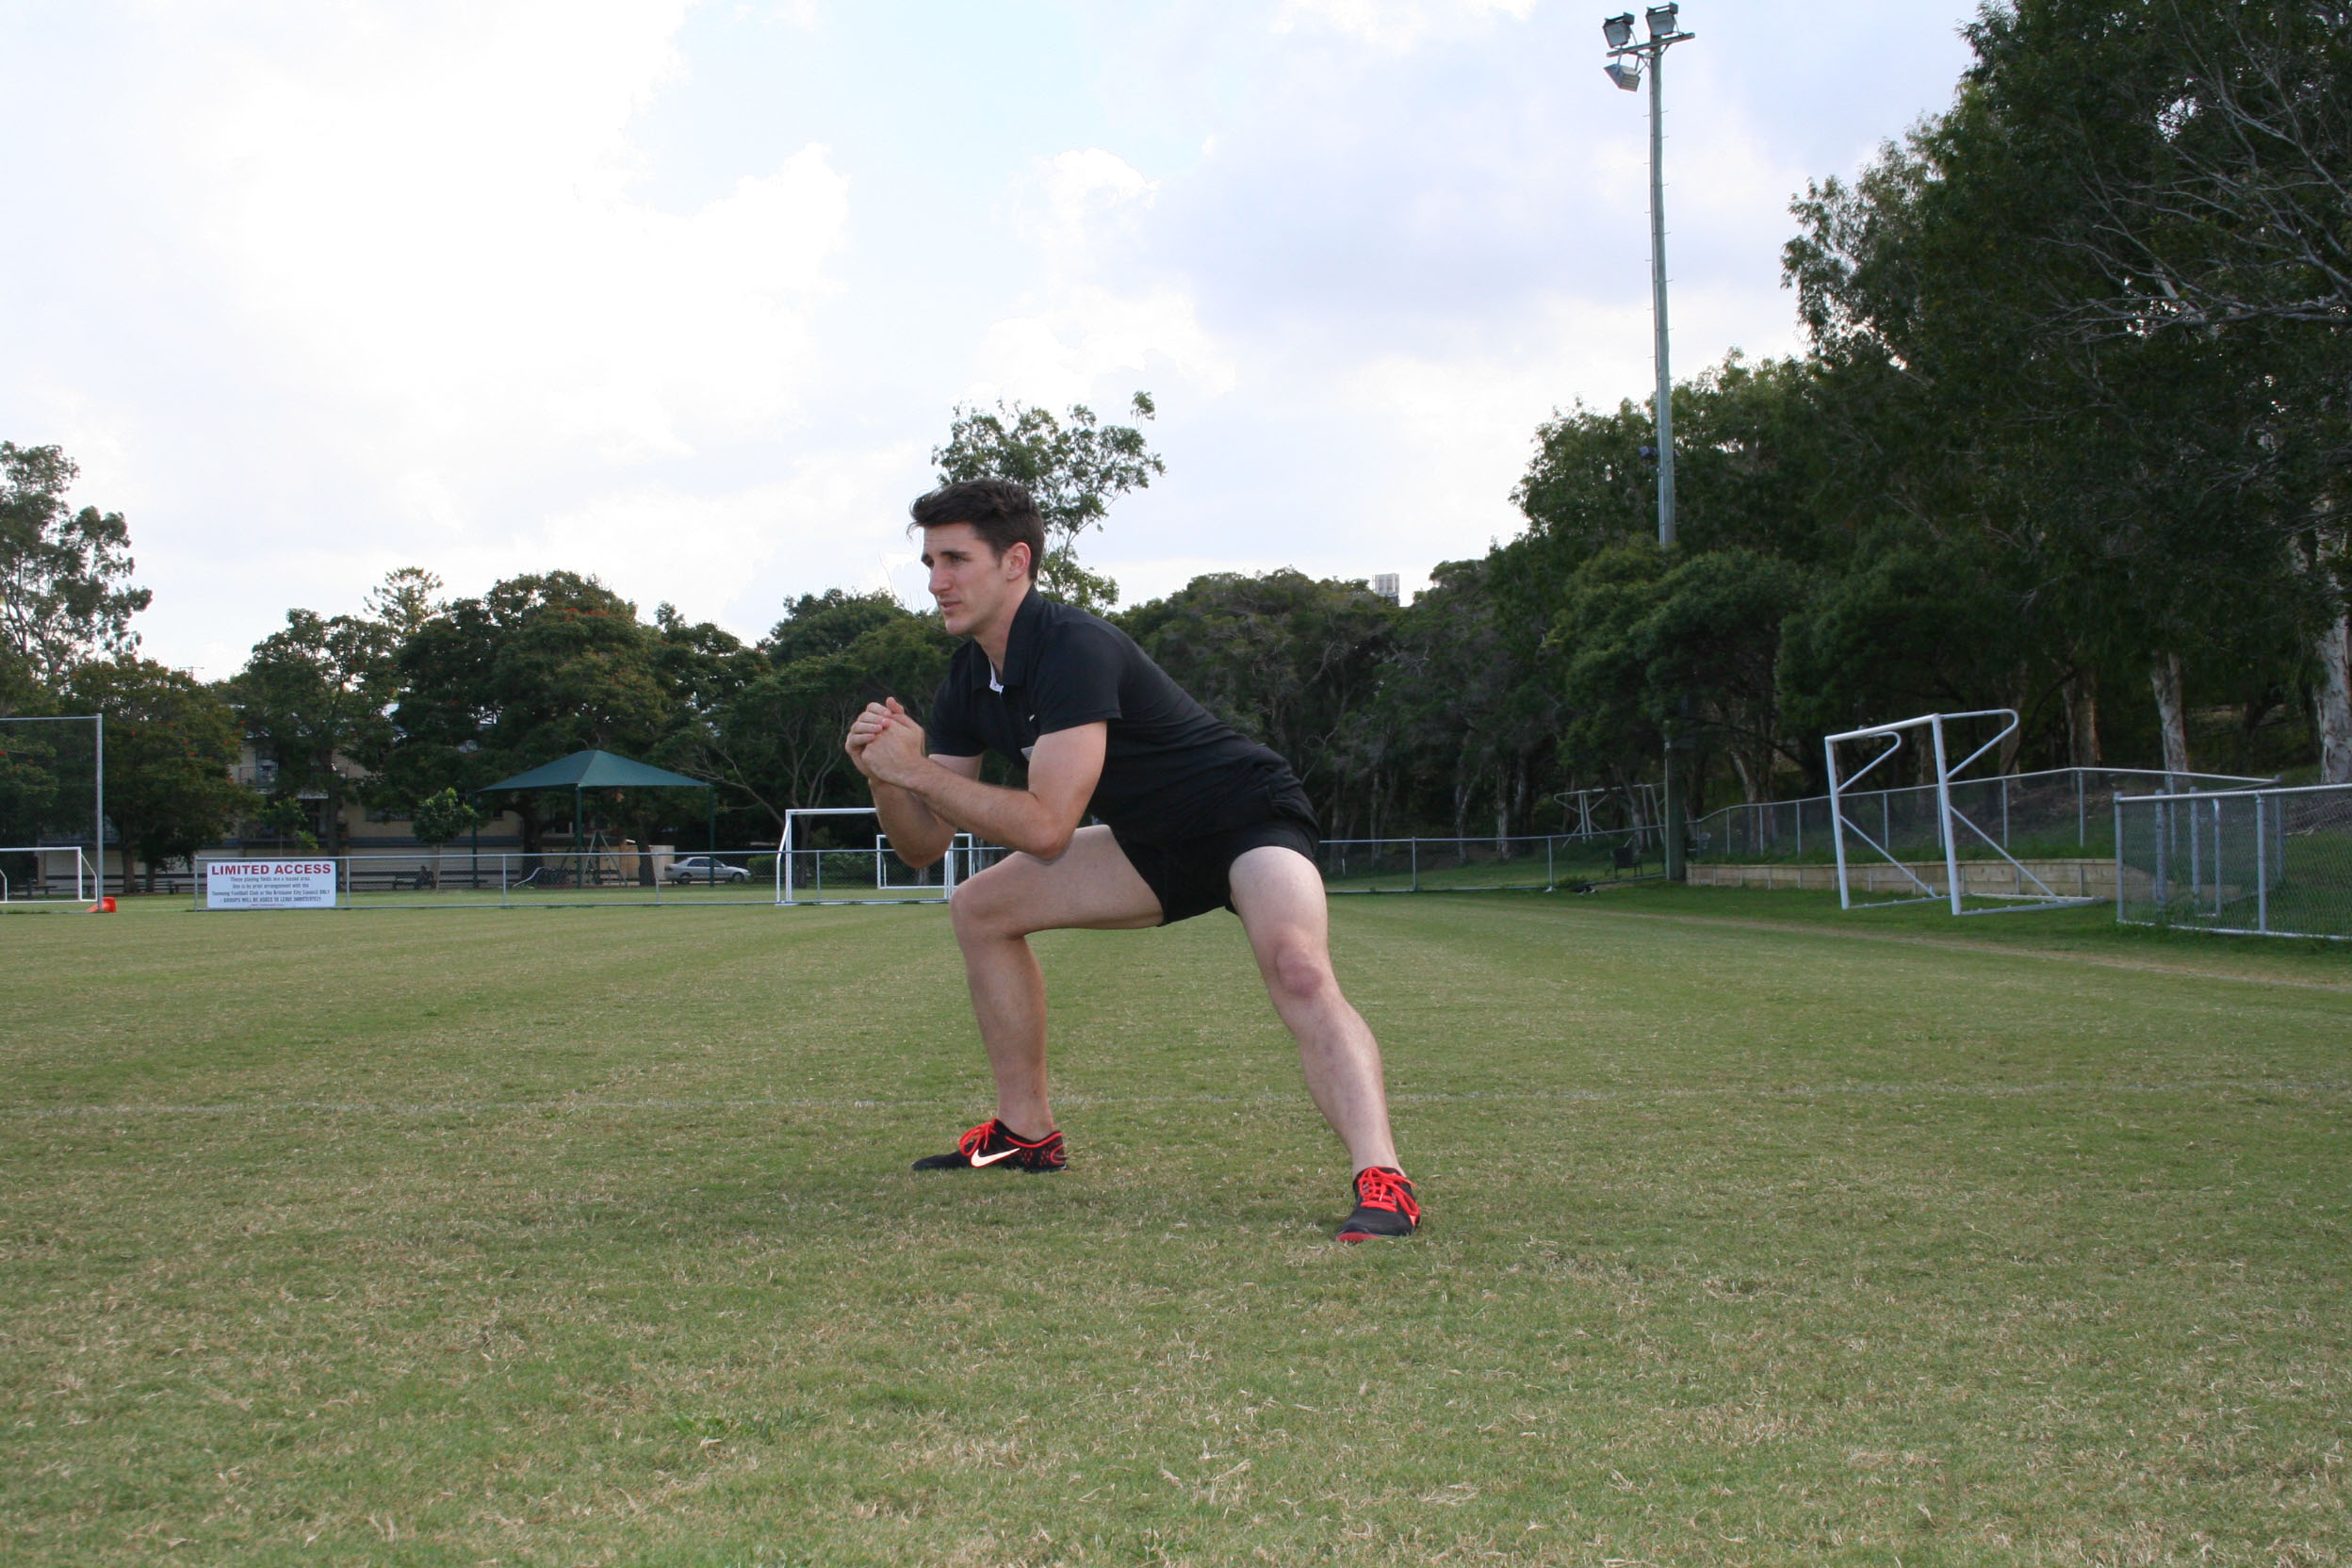
This is a standard squat exercise, with a twist.
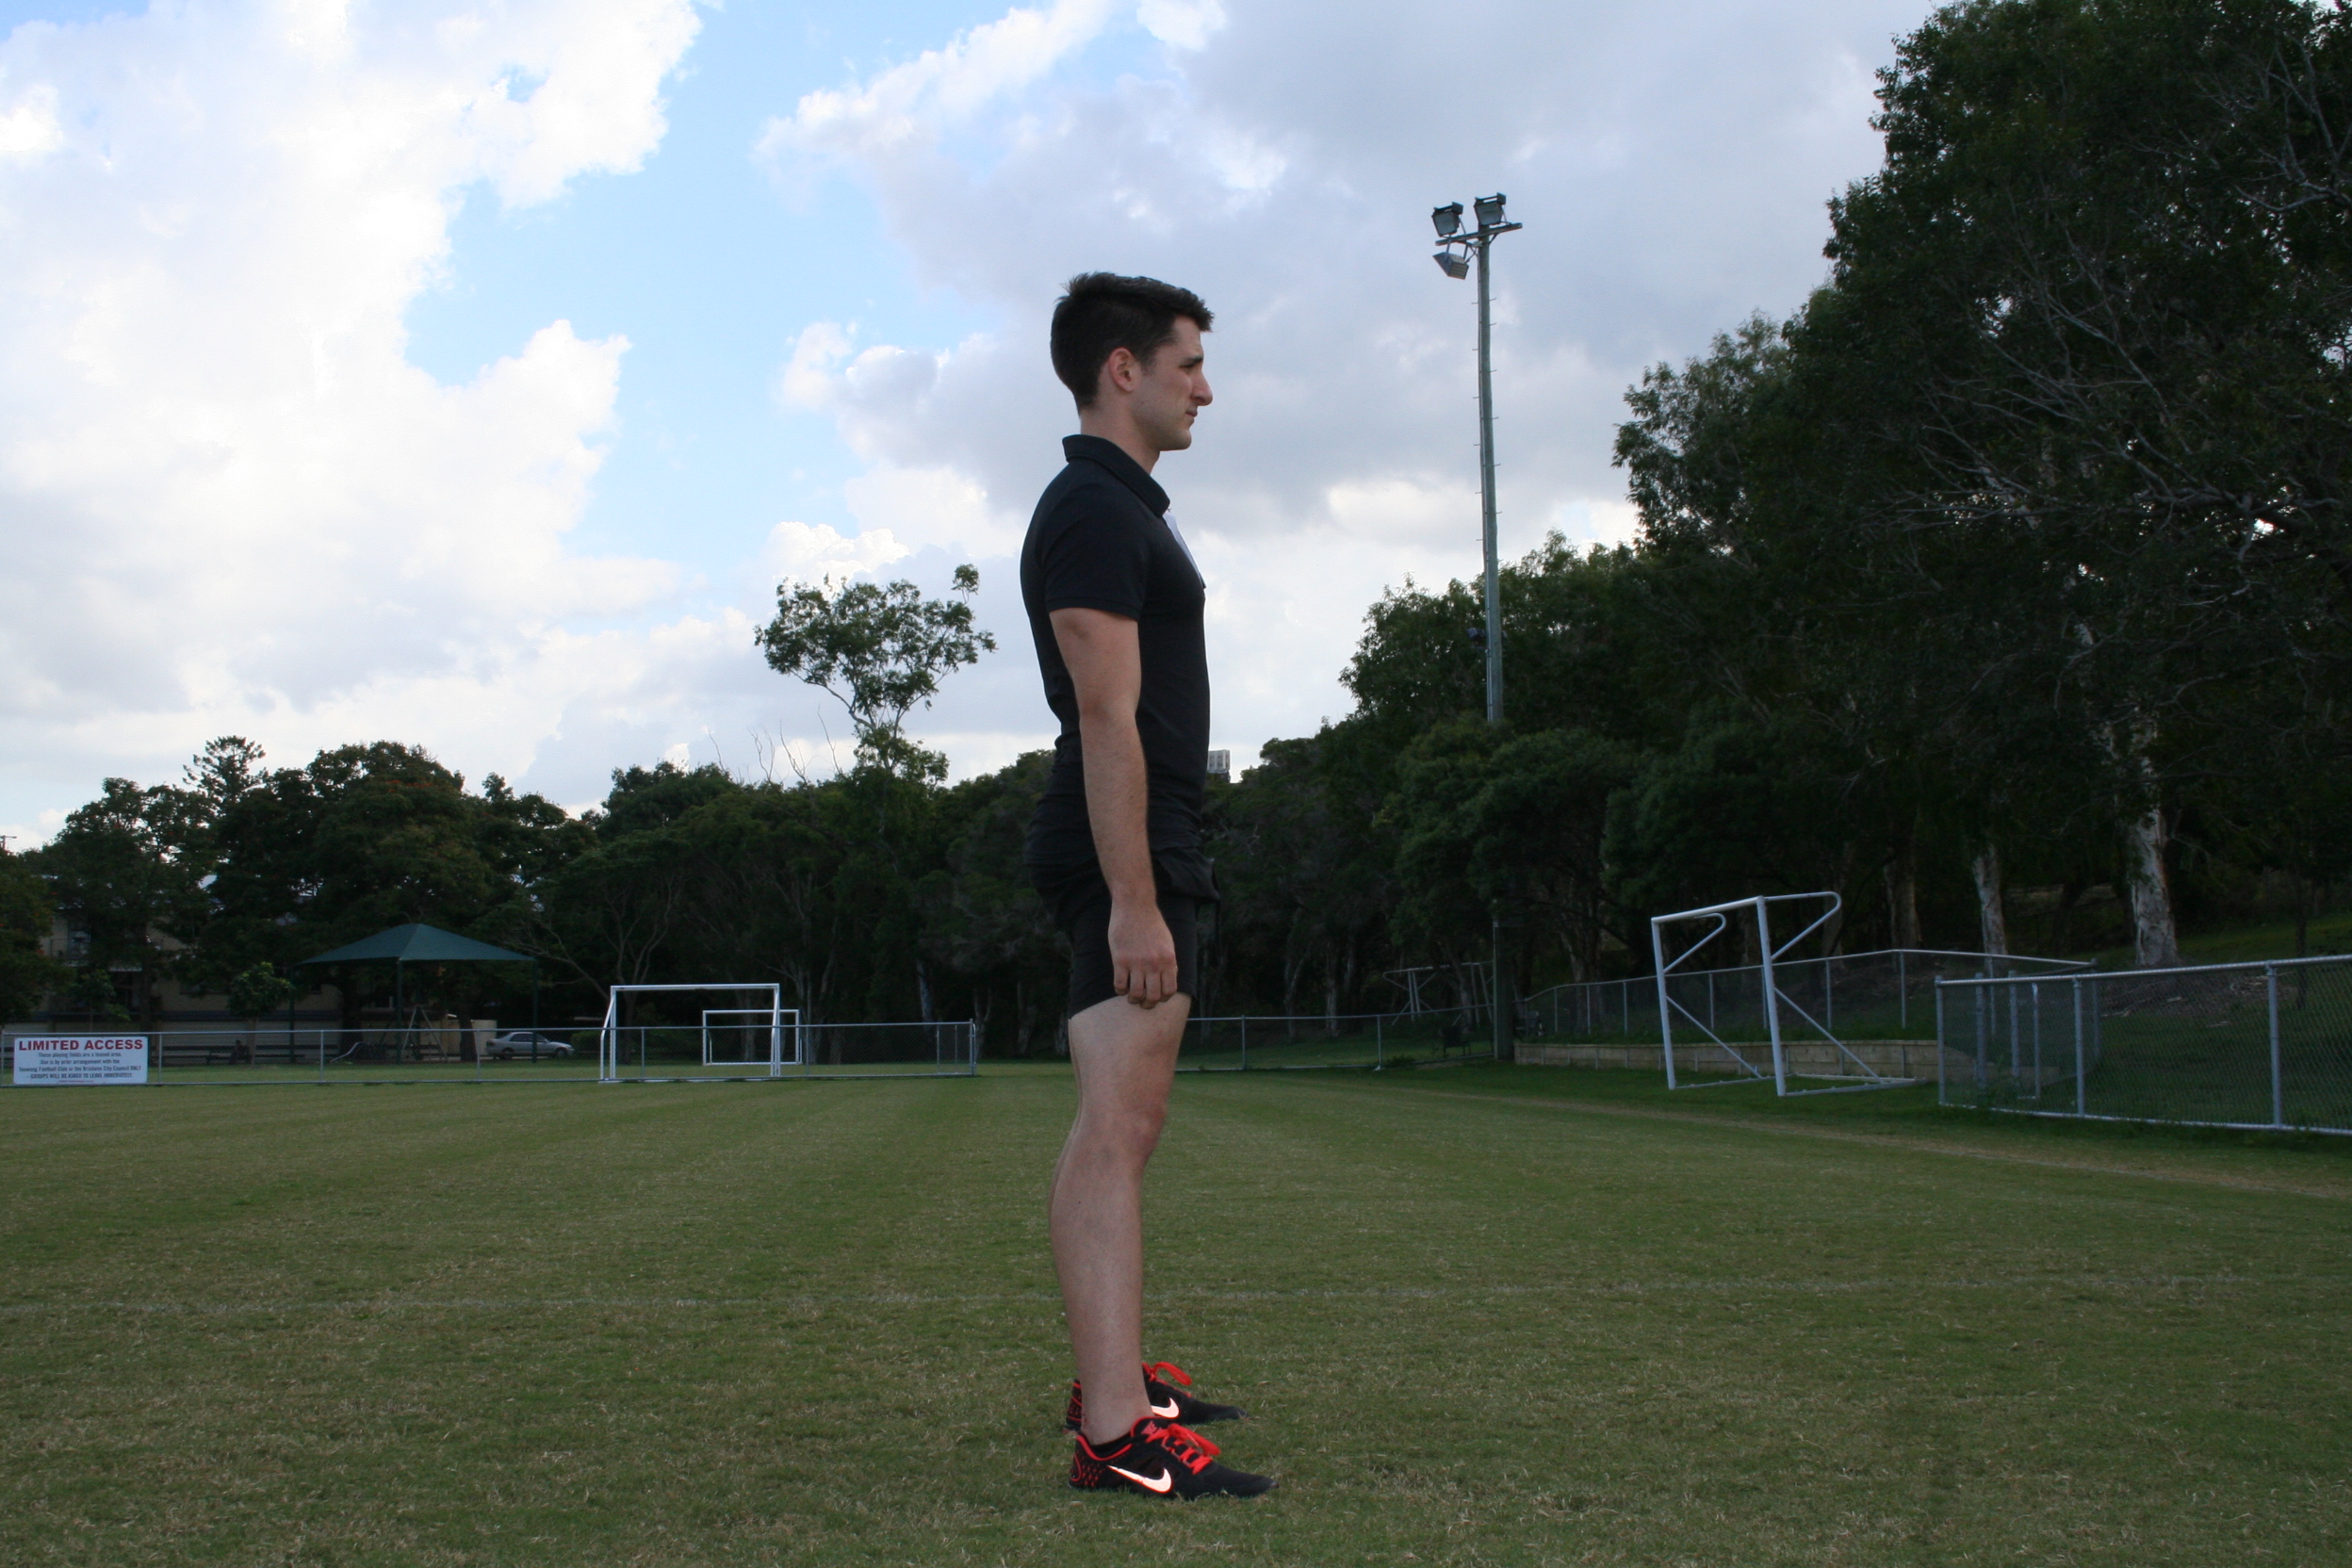
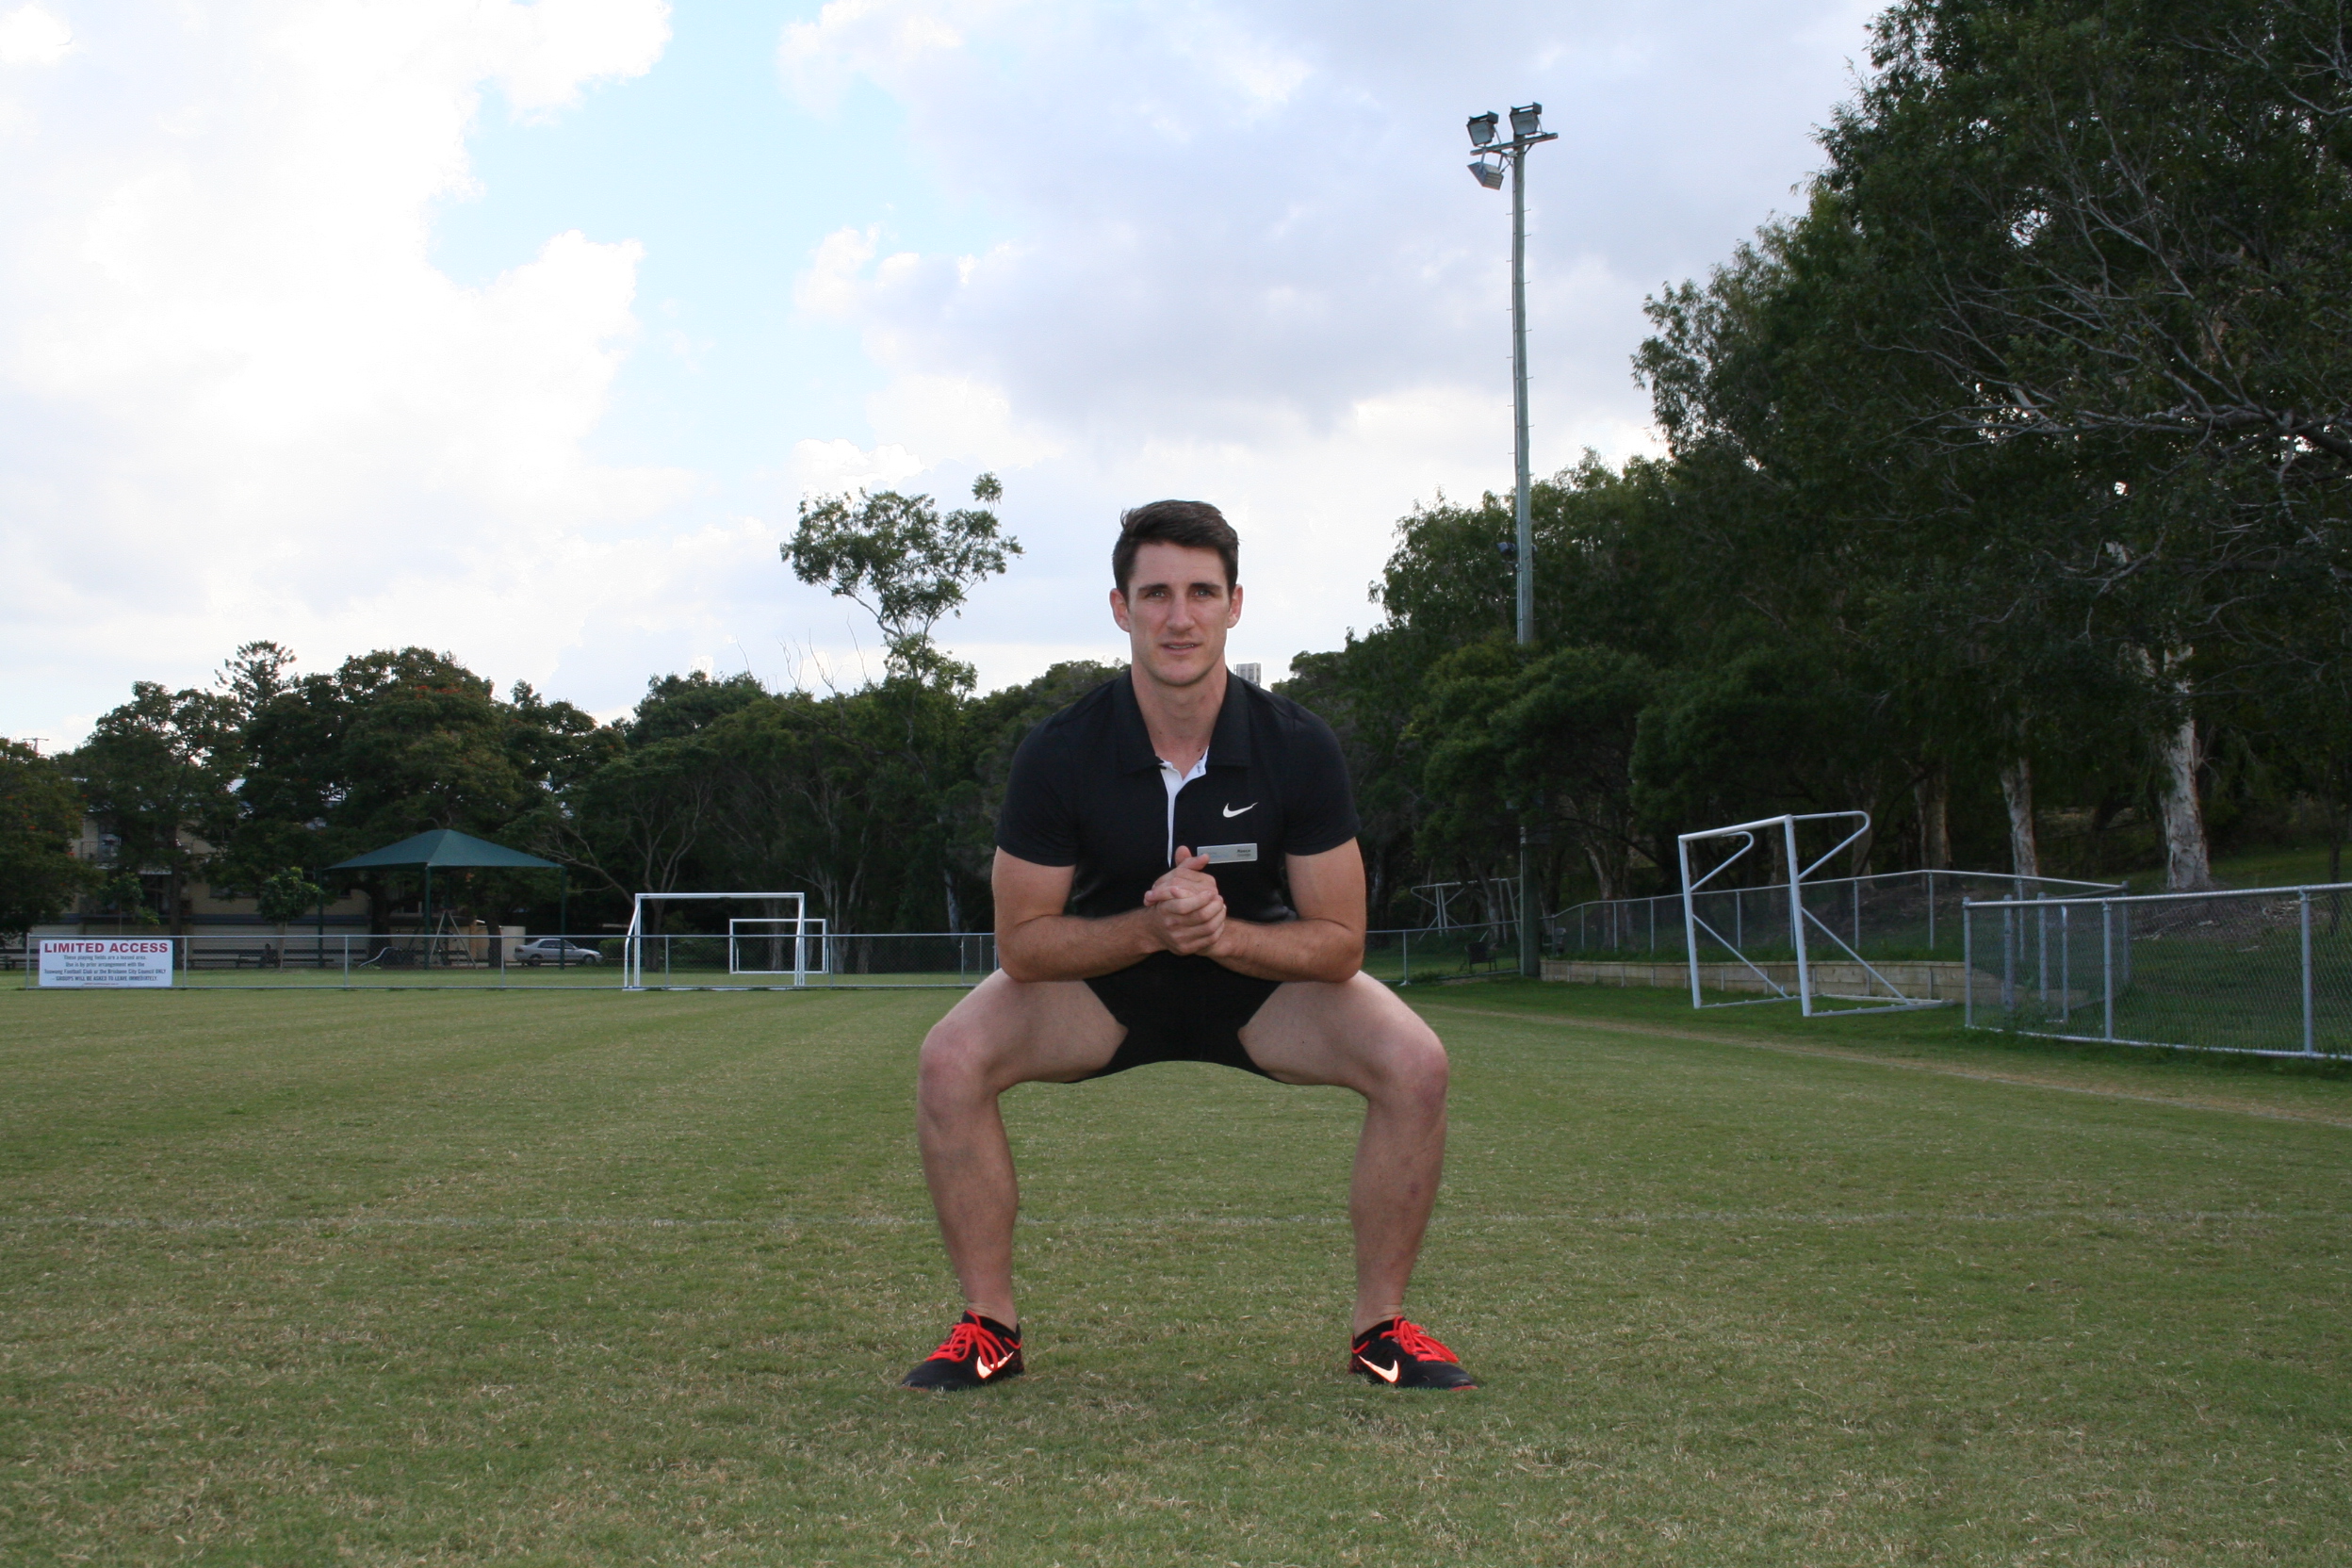
Apply the usual rules to the squat: no knees forward, weight through your heels, bottom back core on and widen your legs slightly wider than hip width and turn your feet out to 11 and 1 o’clock.
Lower your bottom back, keep the knees tracking over the toes and not protruding forward until you are at least parallel to the floor, if not closer. Then slowing raise. Repeat 3 x 20.
Stand with your back and bottom against the wall with your legs slightly out in front, shoulder width apart. Slide your back down the wall keeping your bottom in contact. Make sure you don’t go down any further than 90 degrees at the knees, then push yourself back up the wall. Simple!

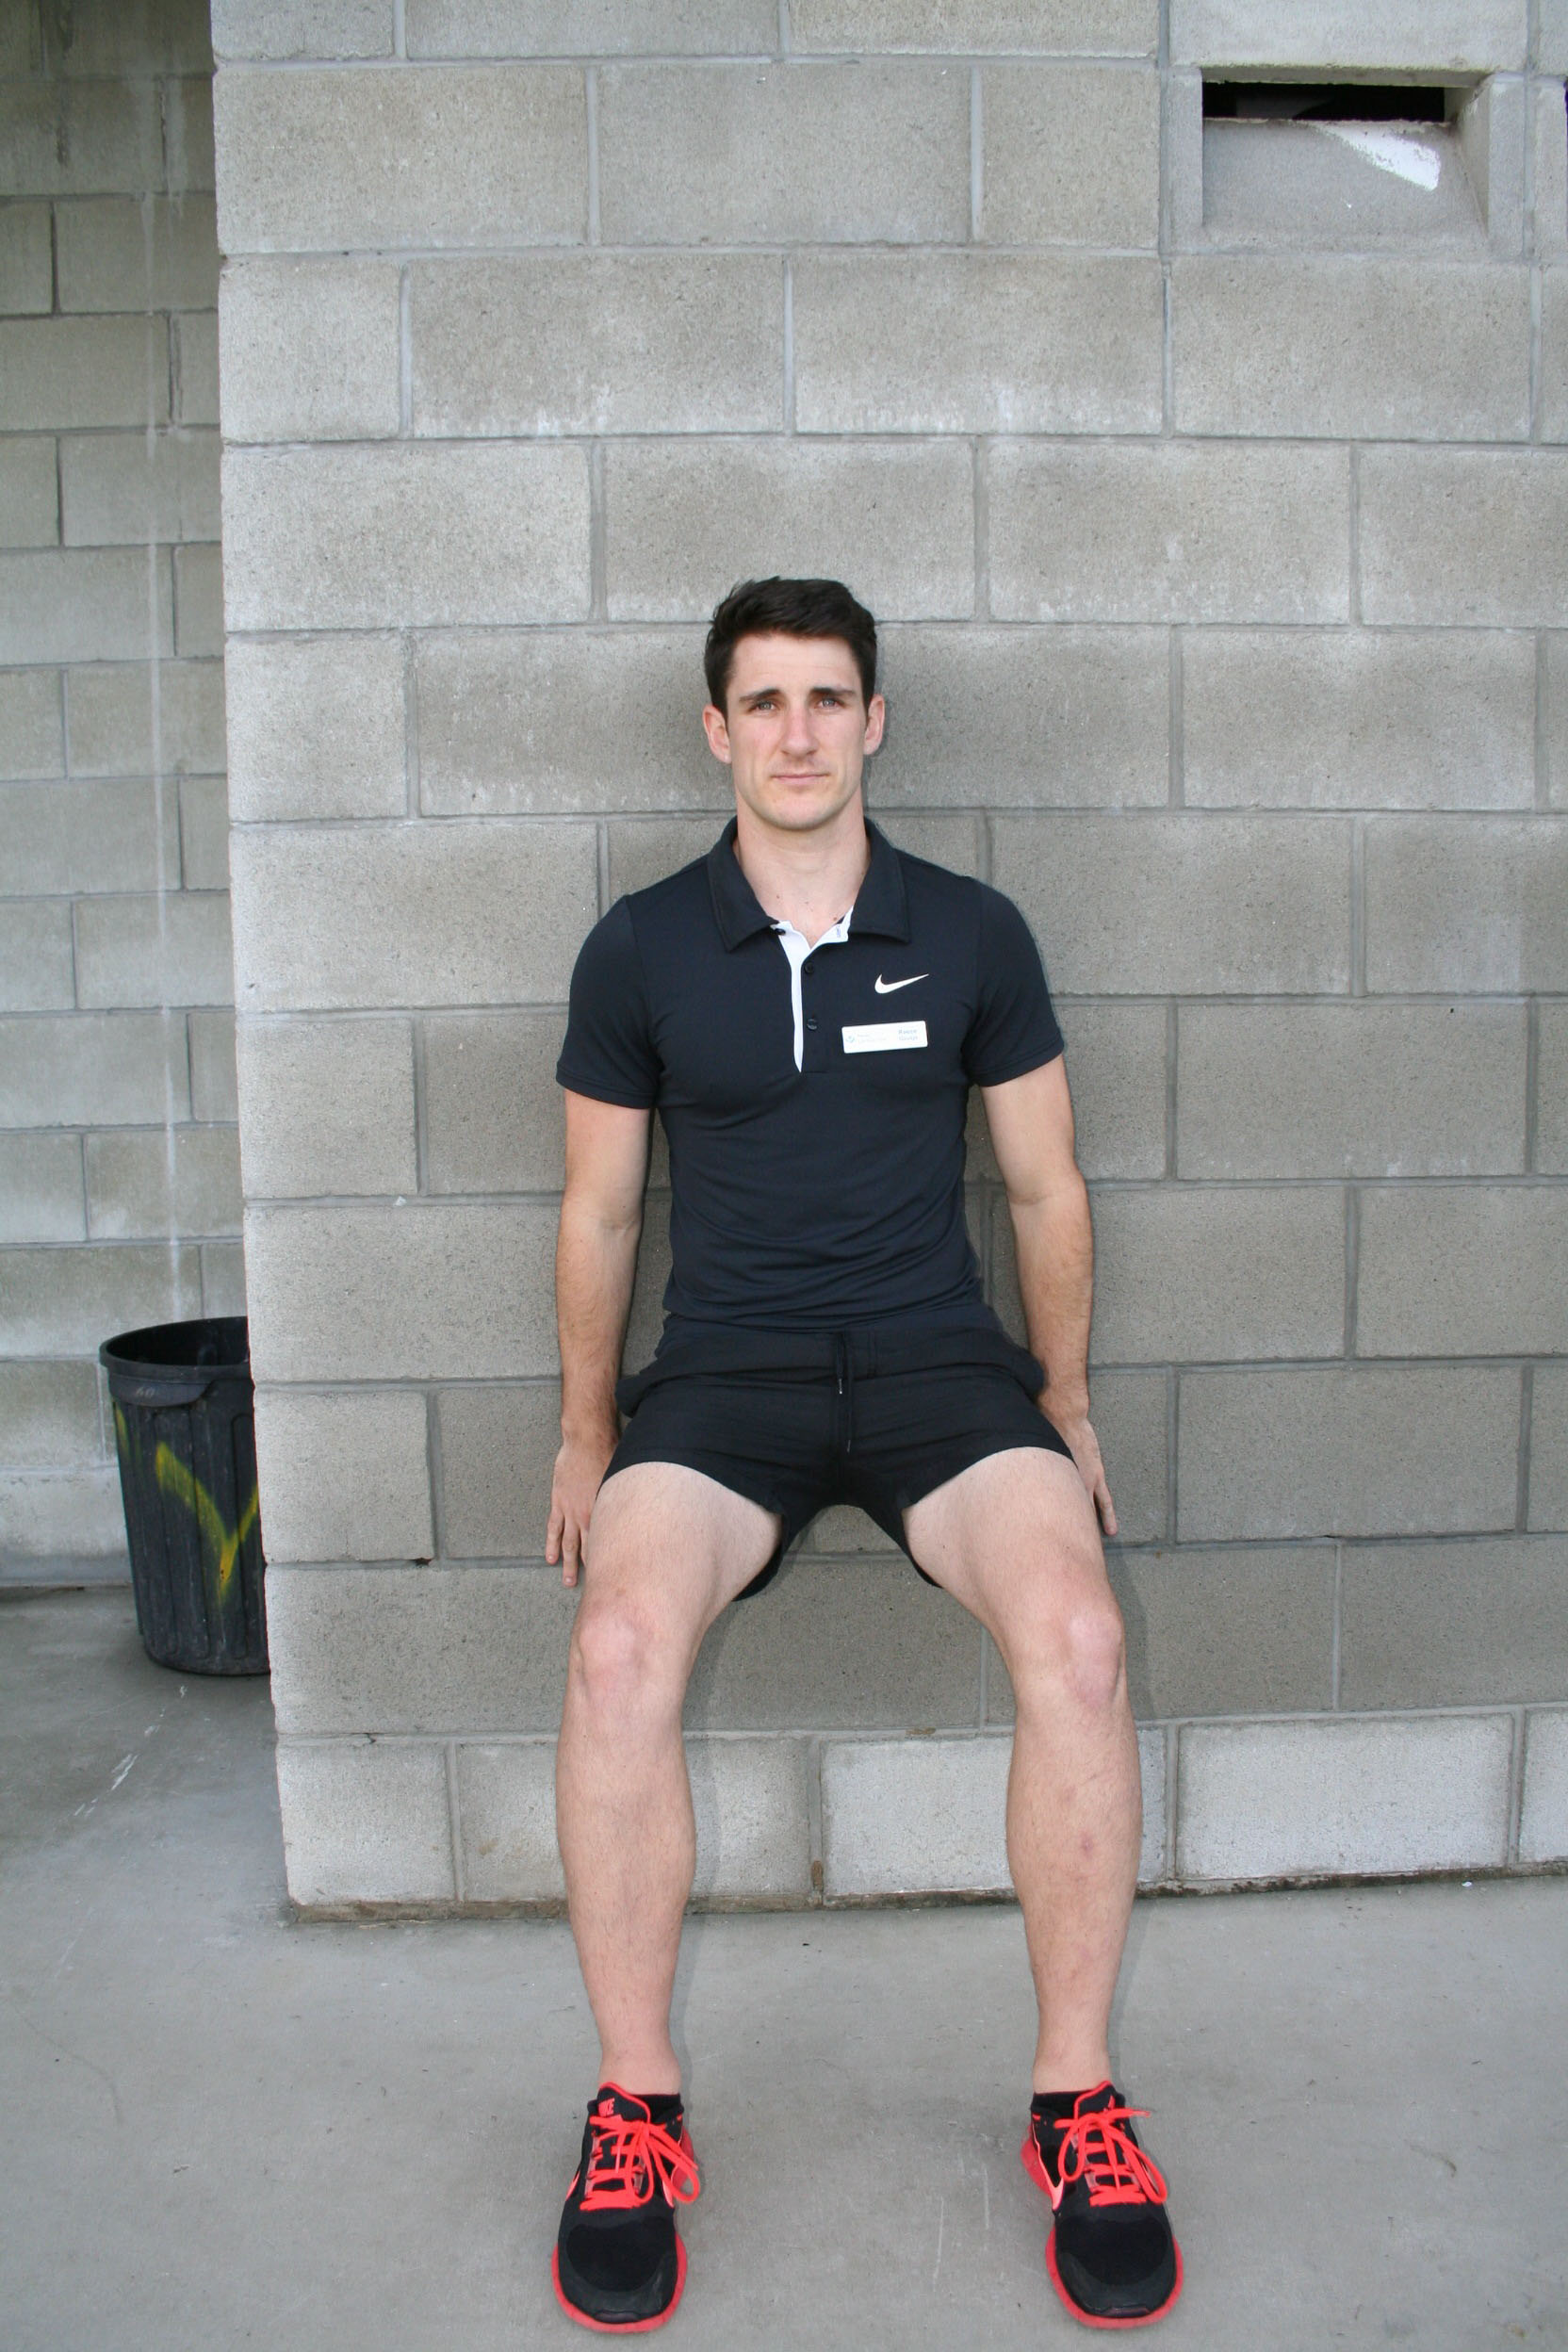
To add an extra challenge, try holding yourself in the down phase of a wall squat for 10 seconds.
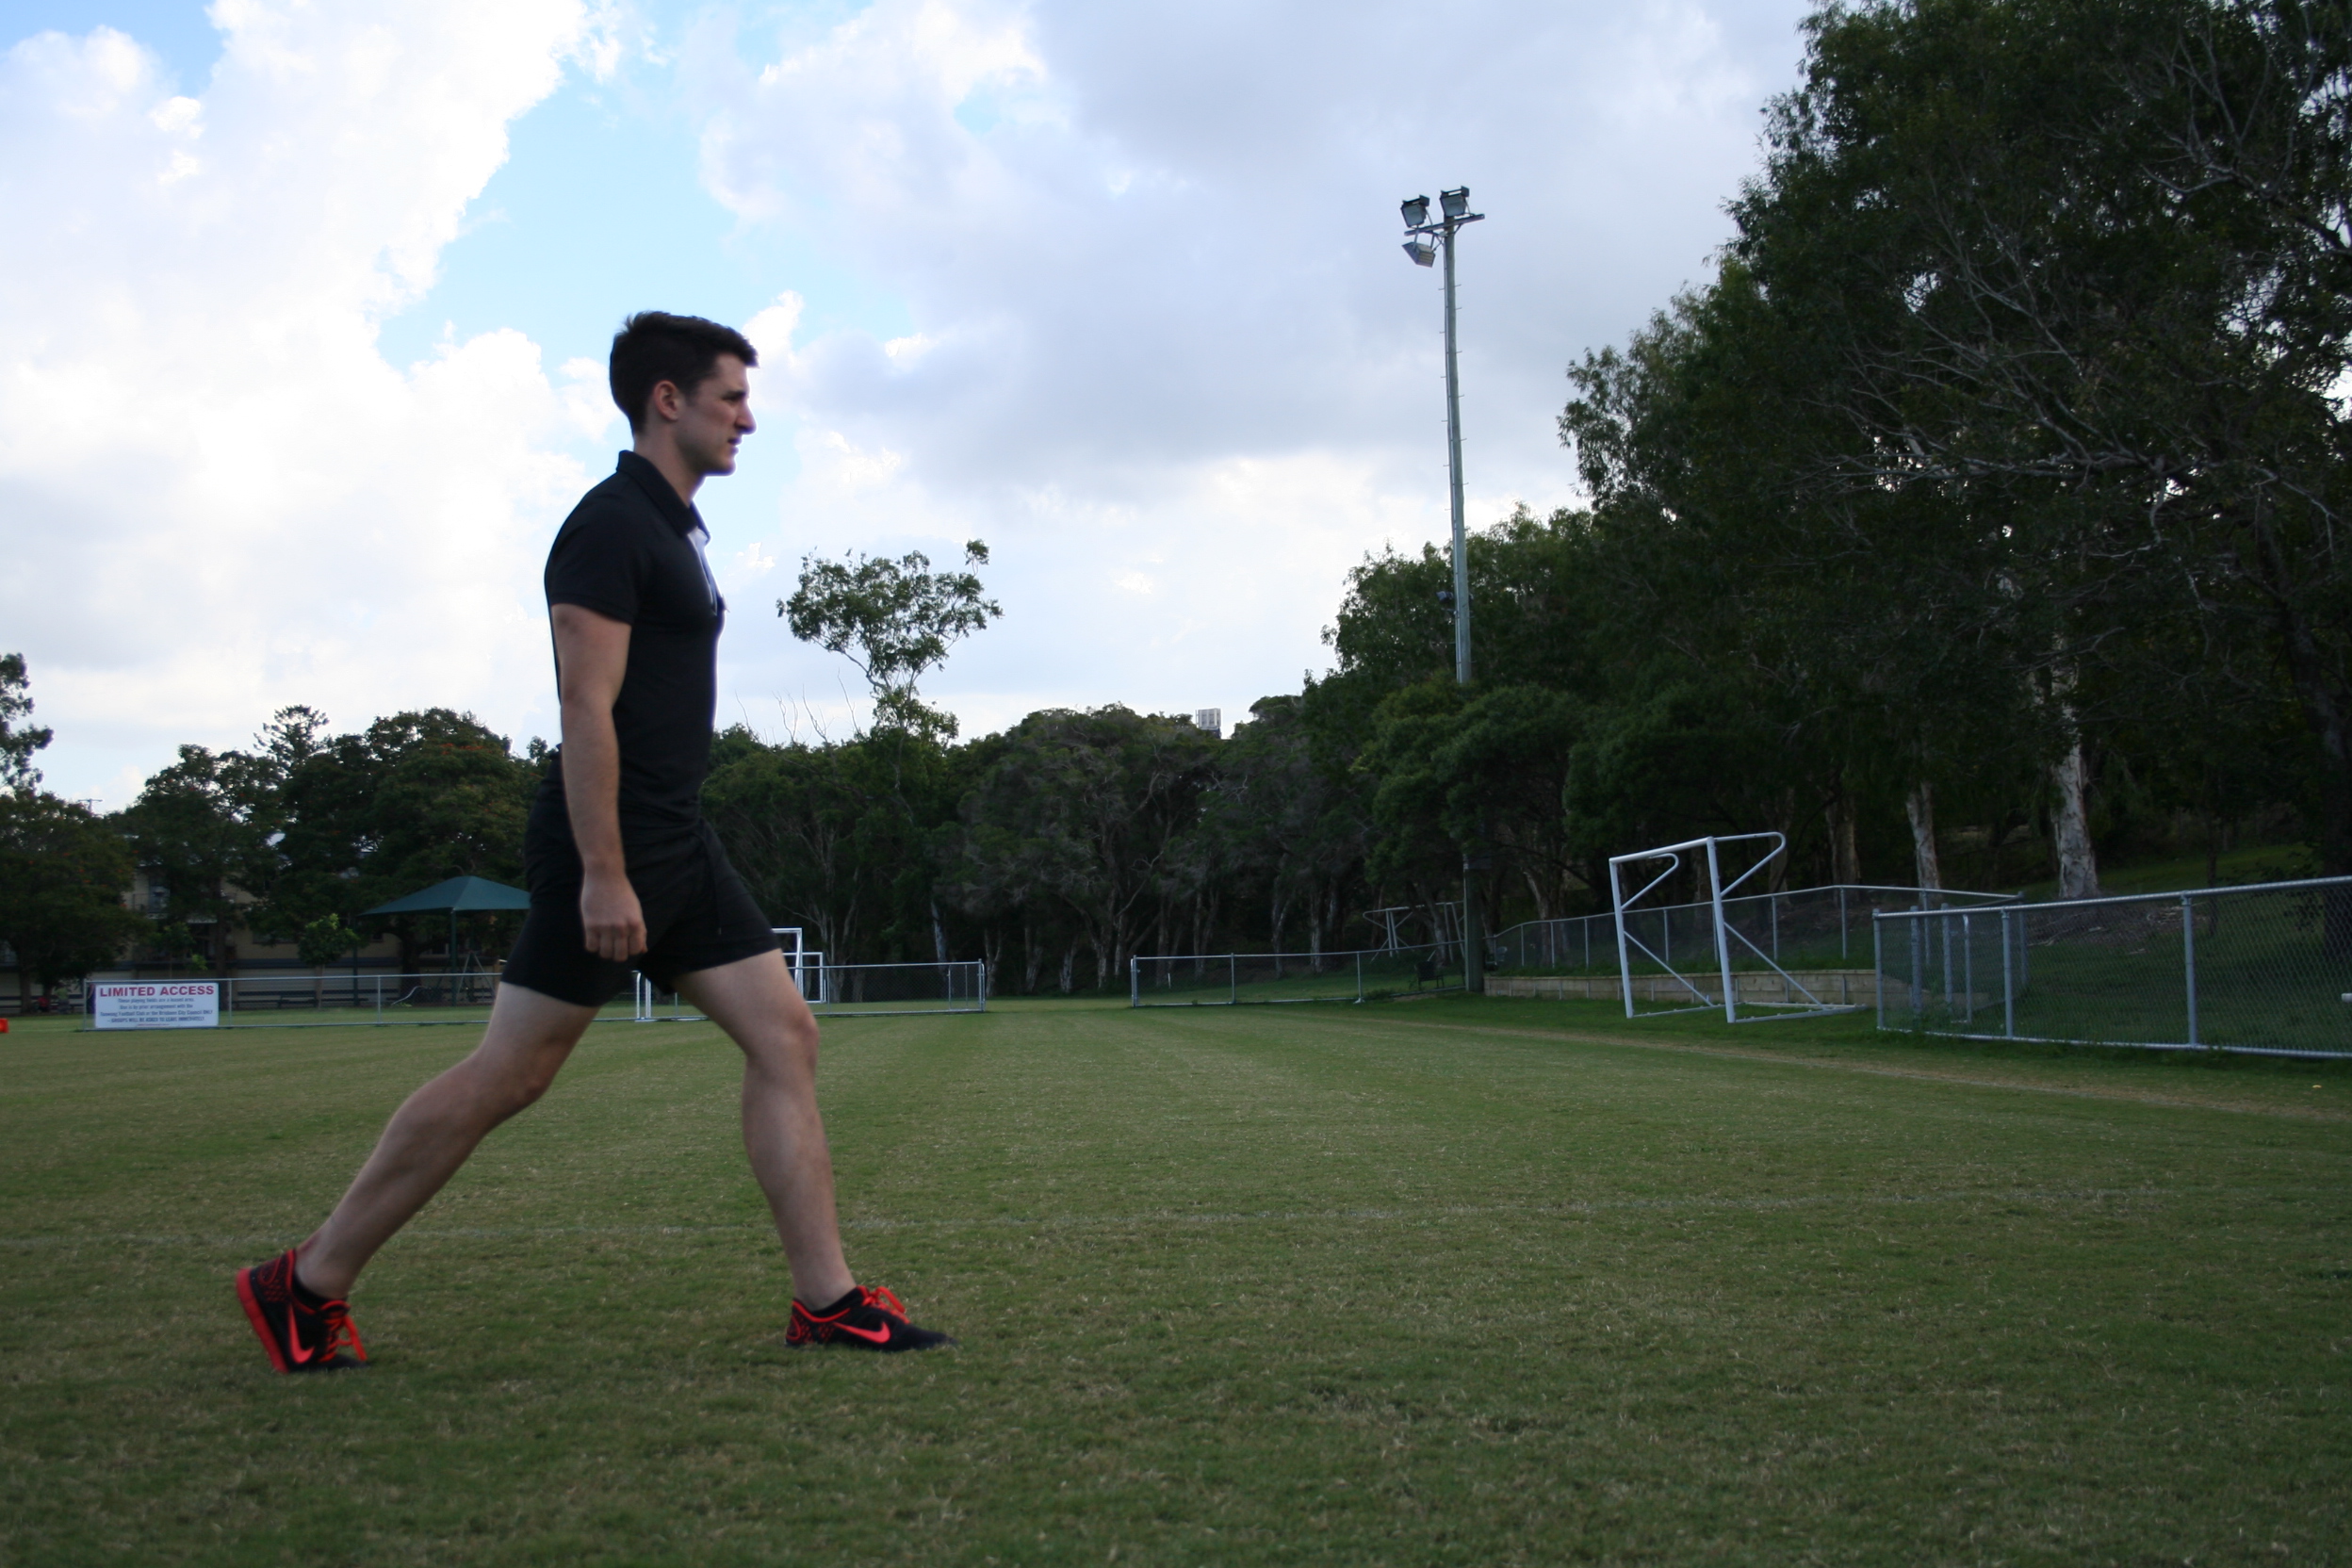
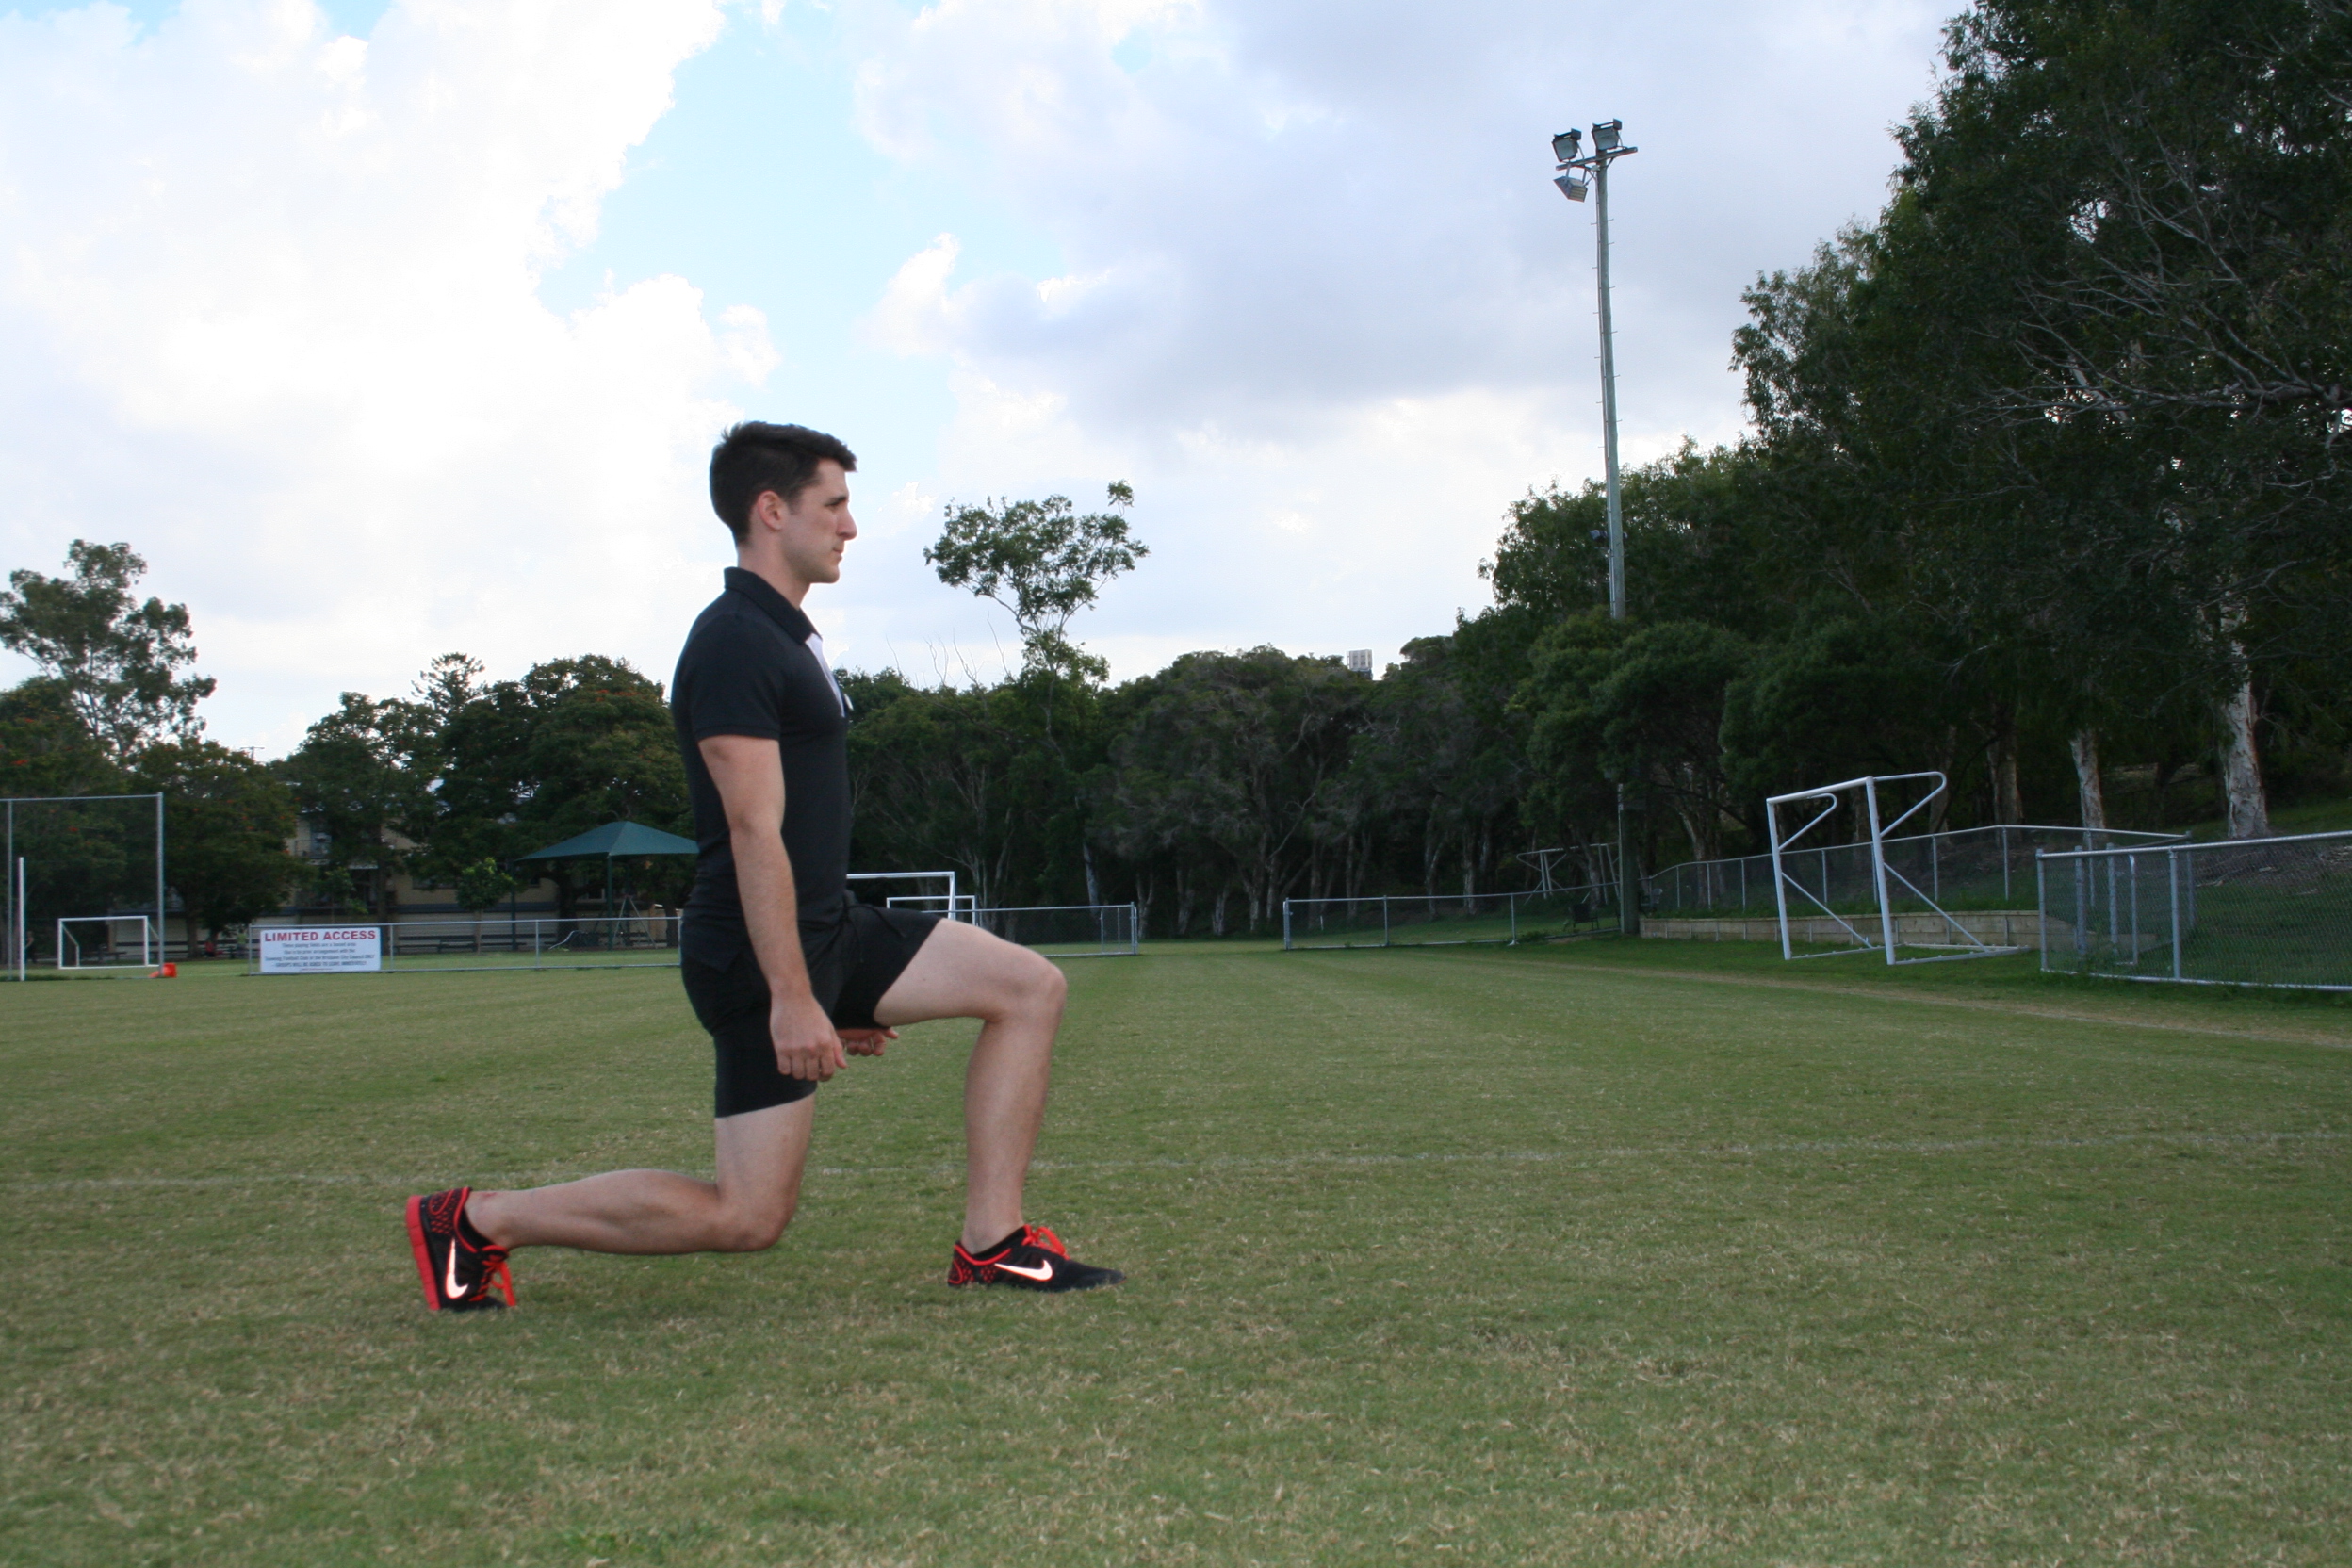
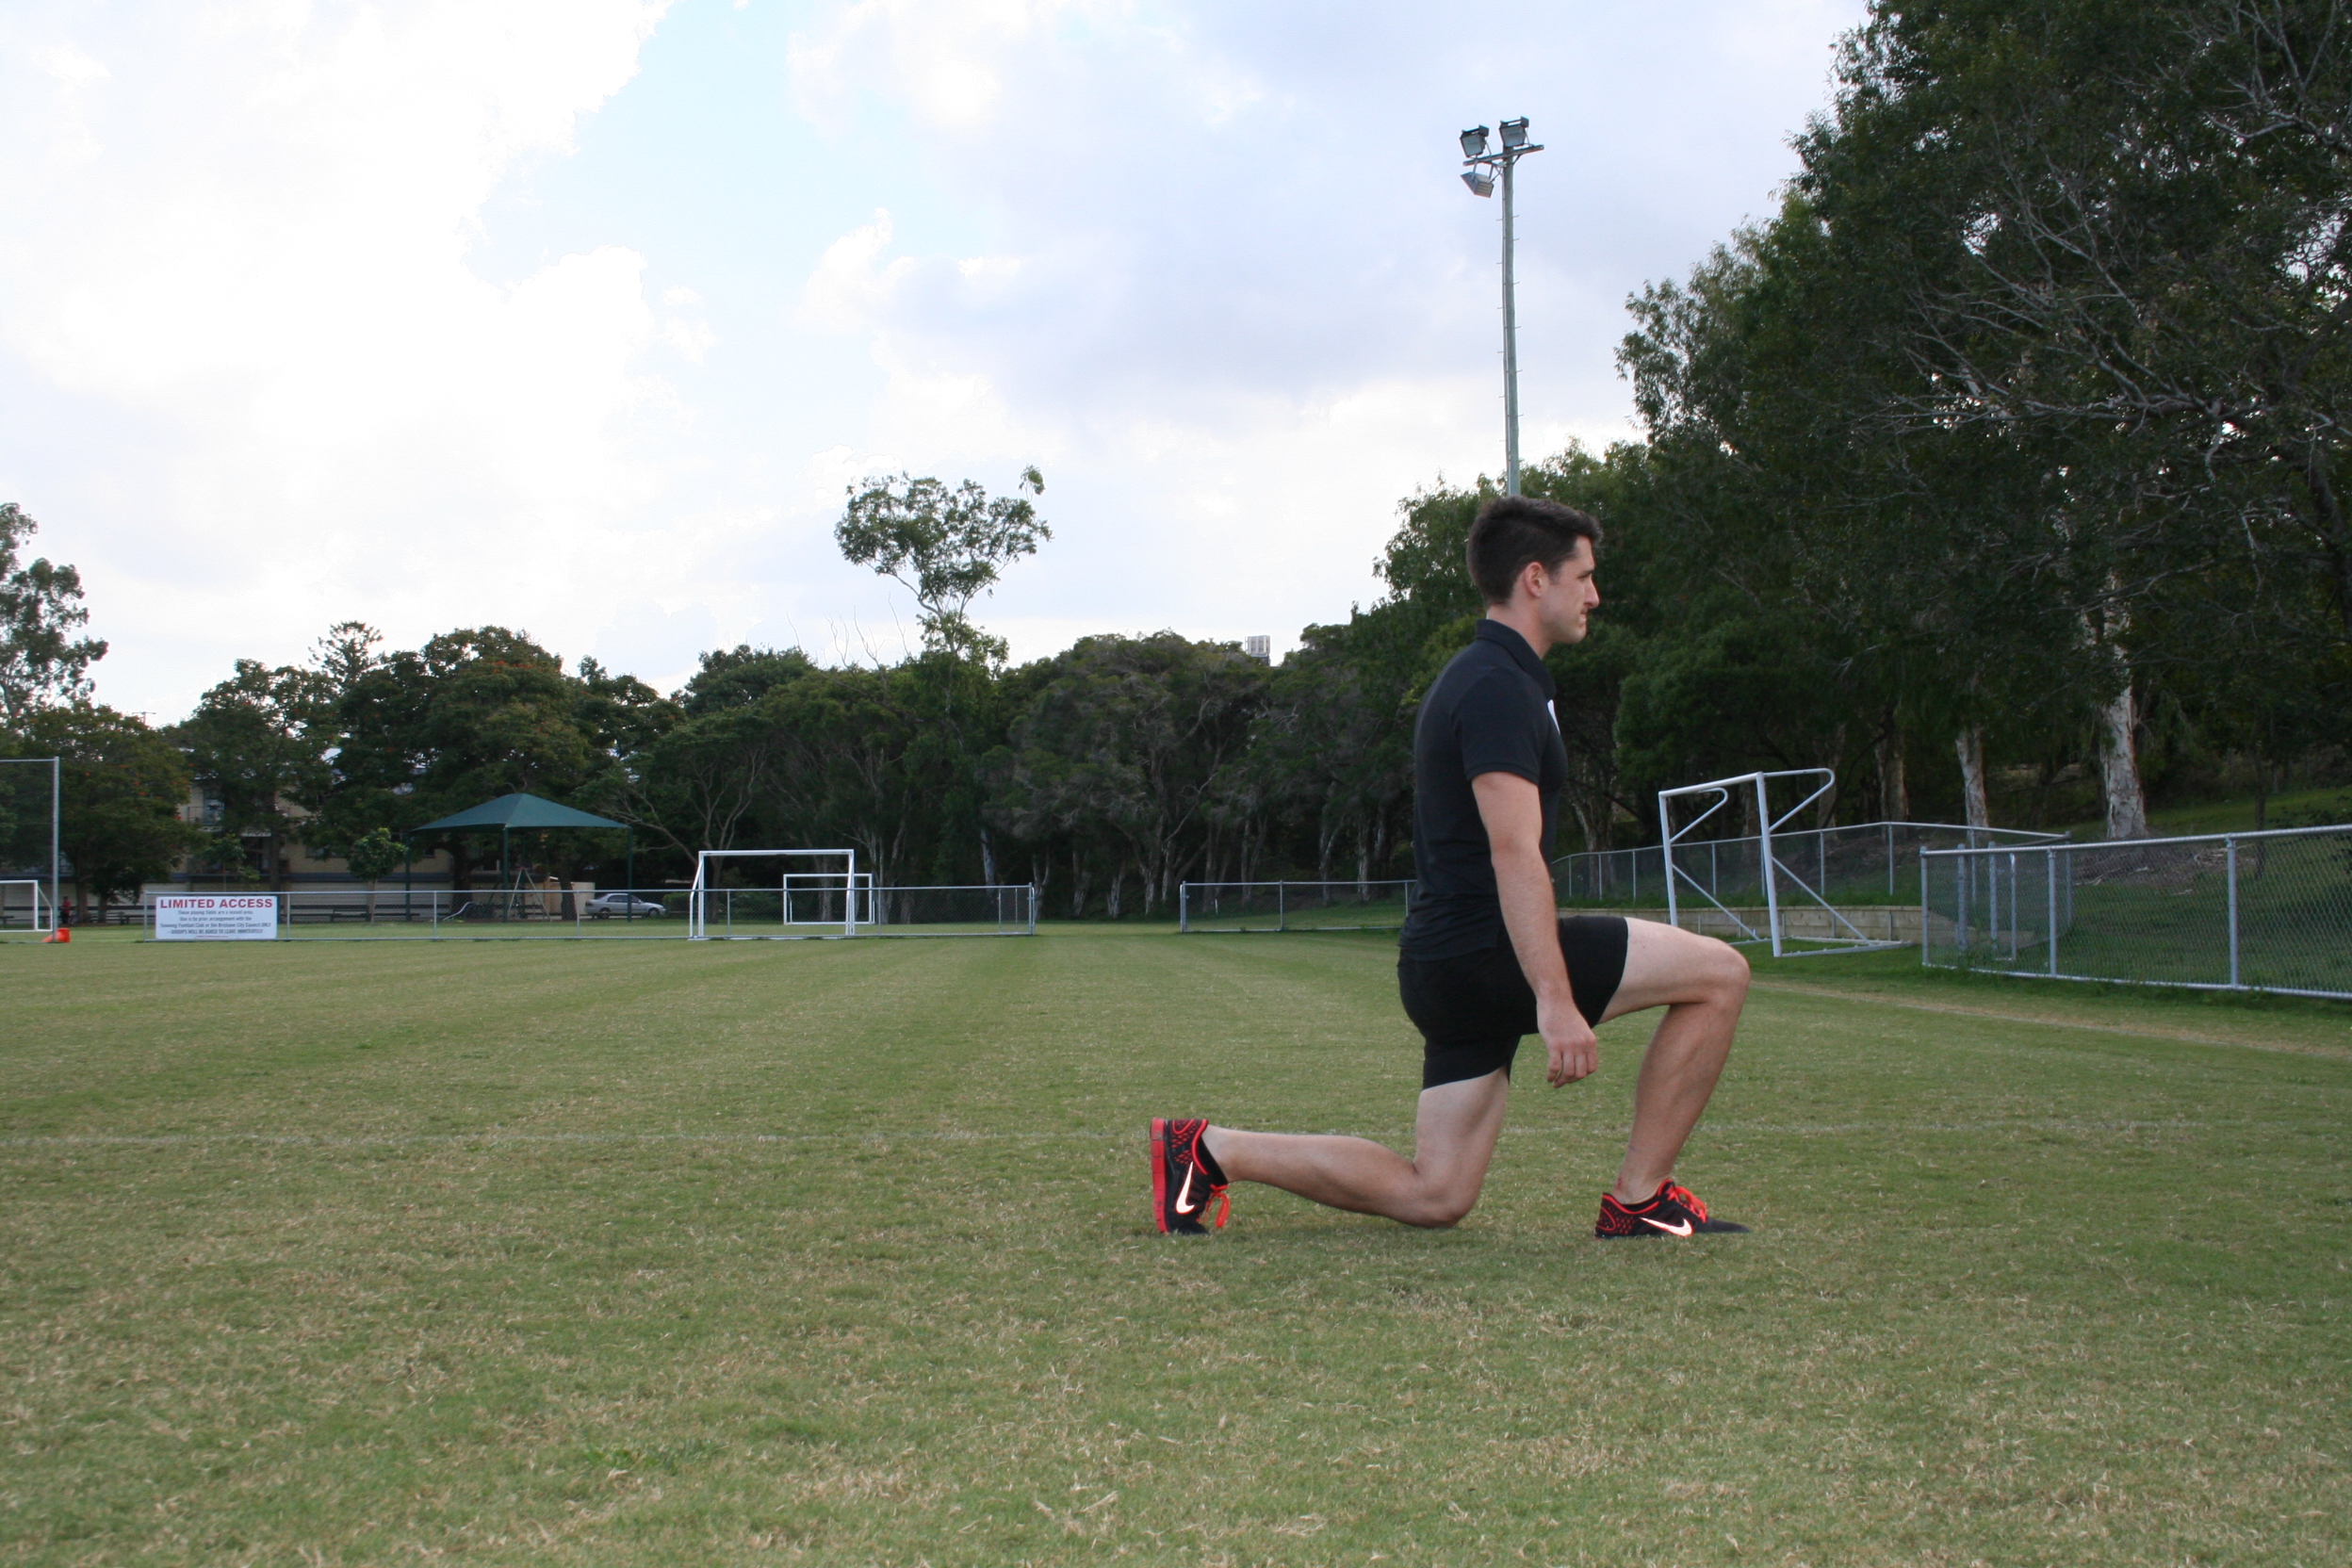
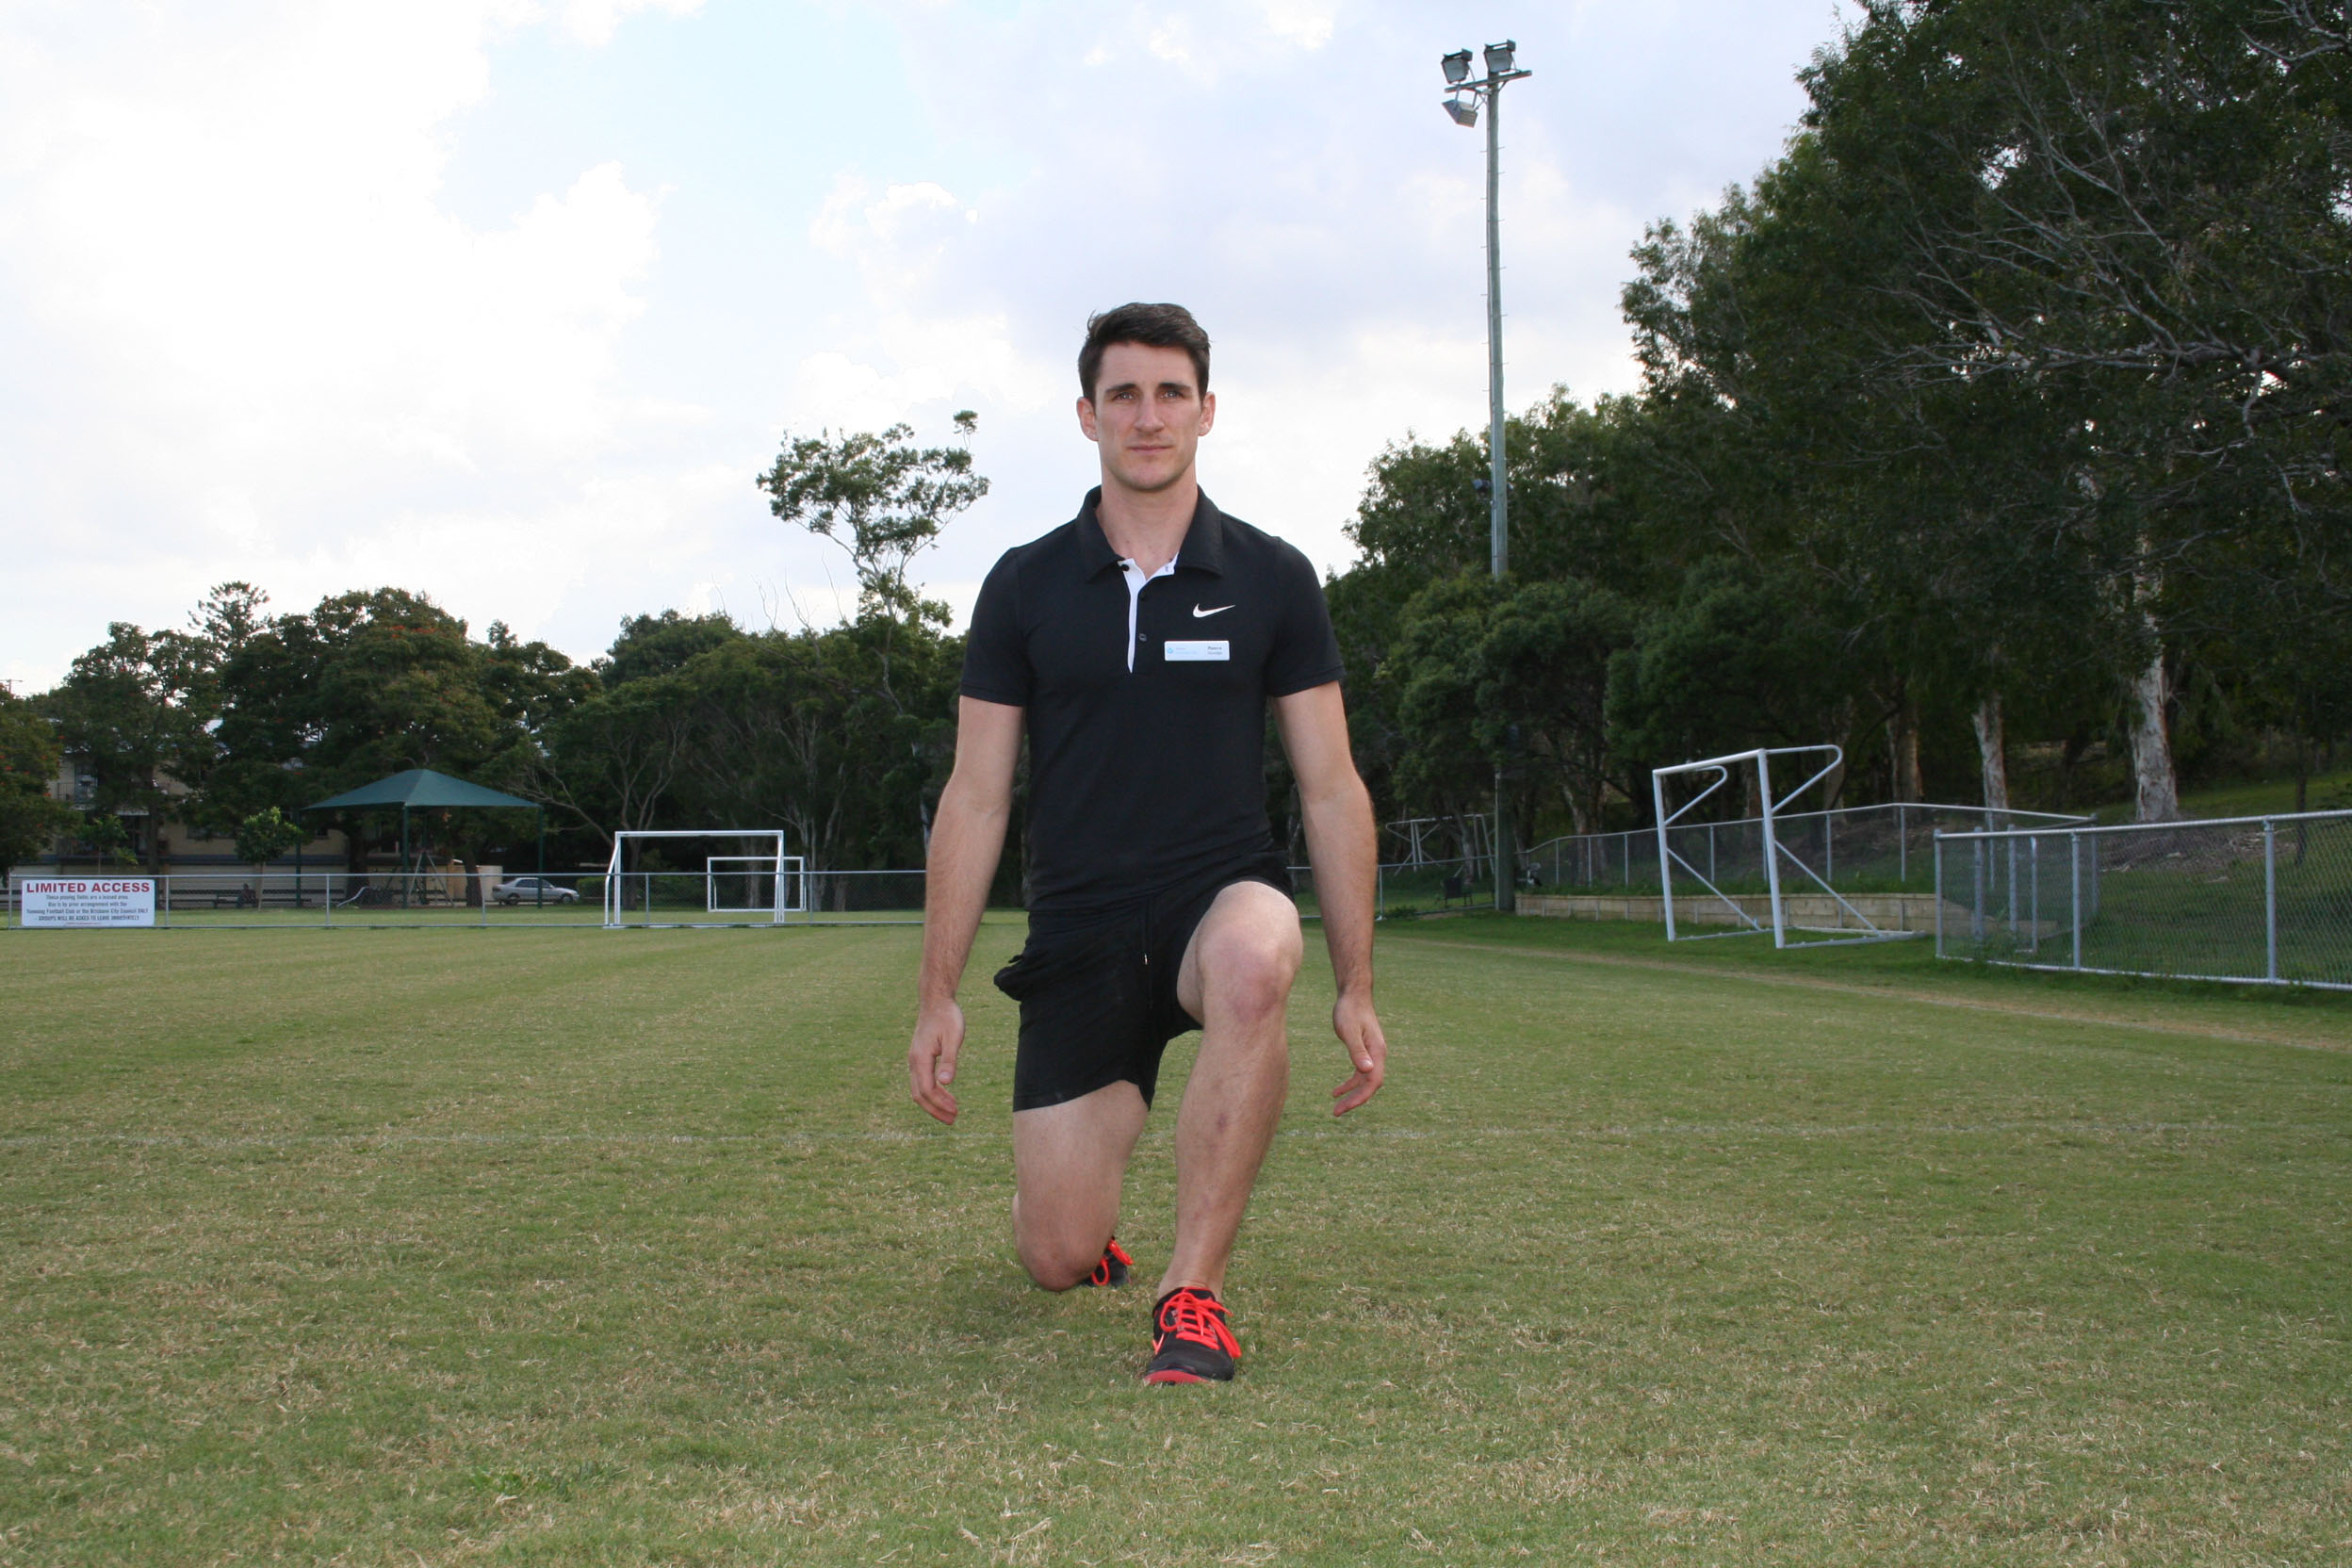
Keeping your feet hip width apart, take a step forward, drop your back knee down first and lower the body down until your knee is just off the floor. Then with your weight going through your front heel, push off and step forward and repeat with the other leg.
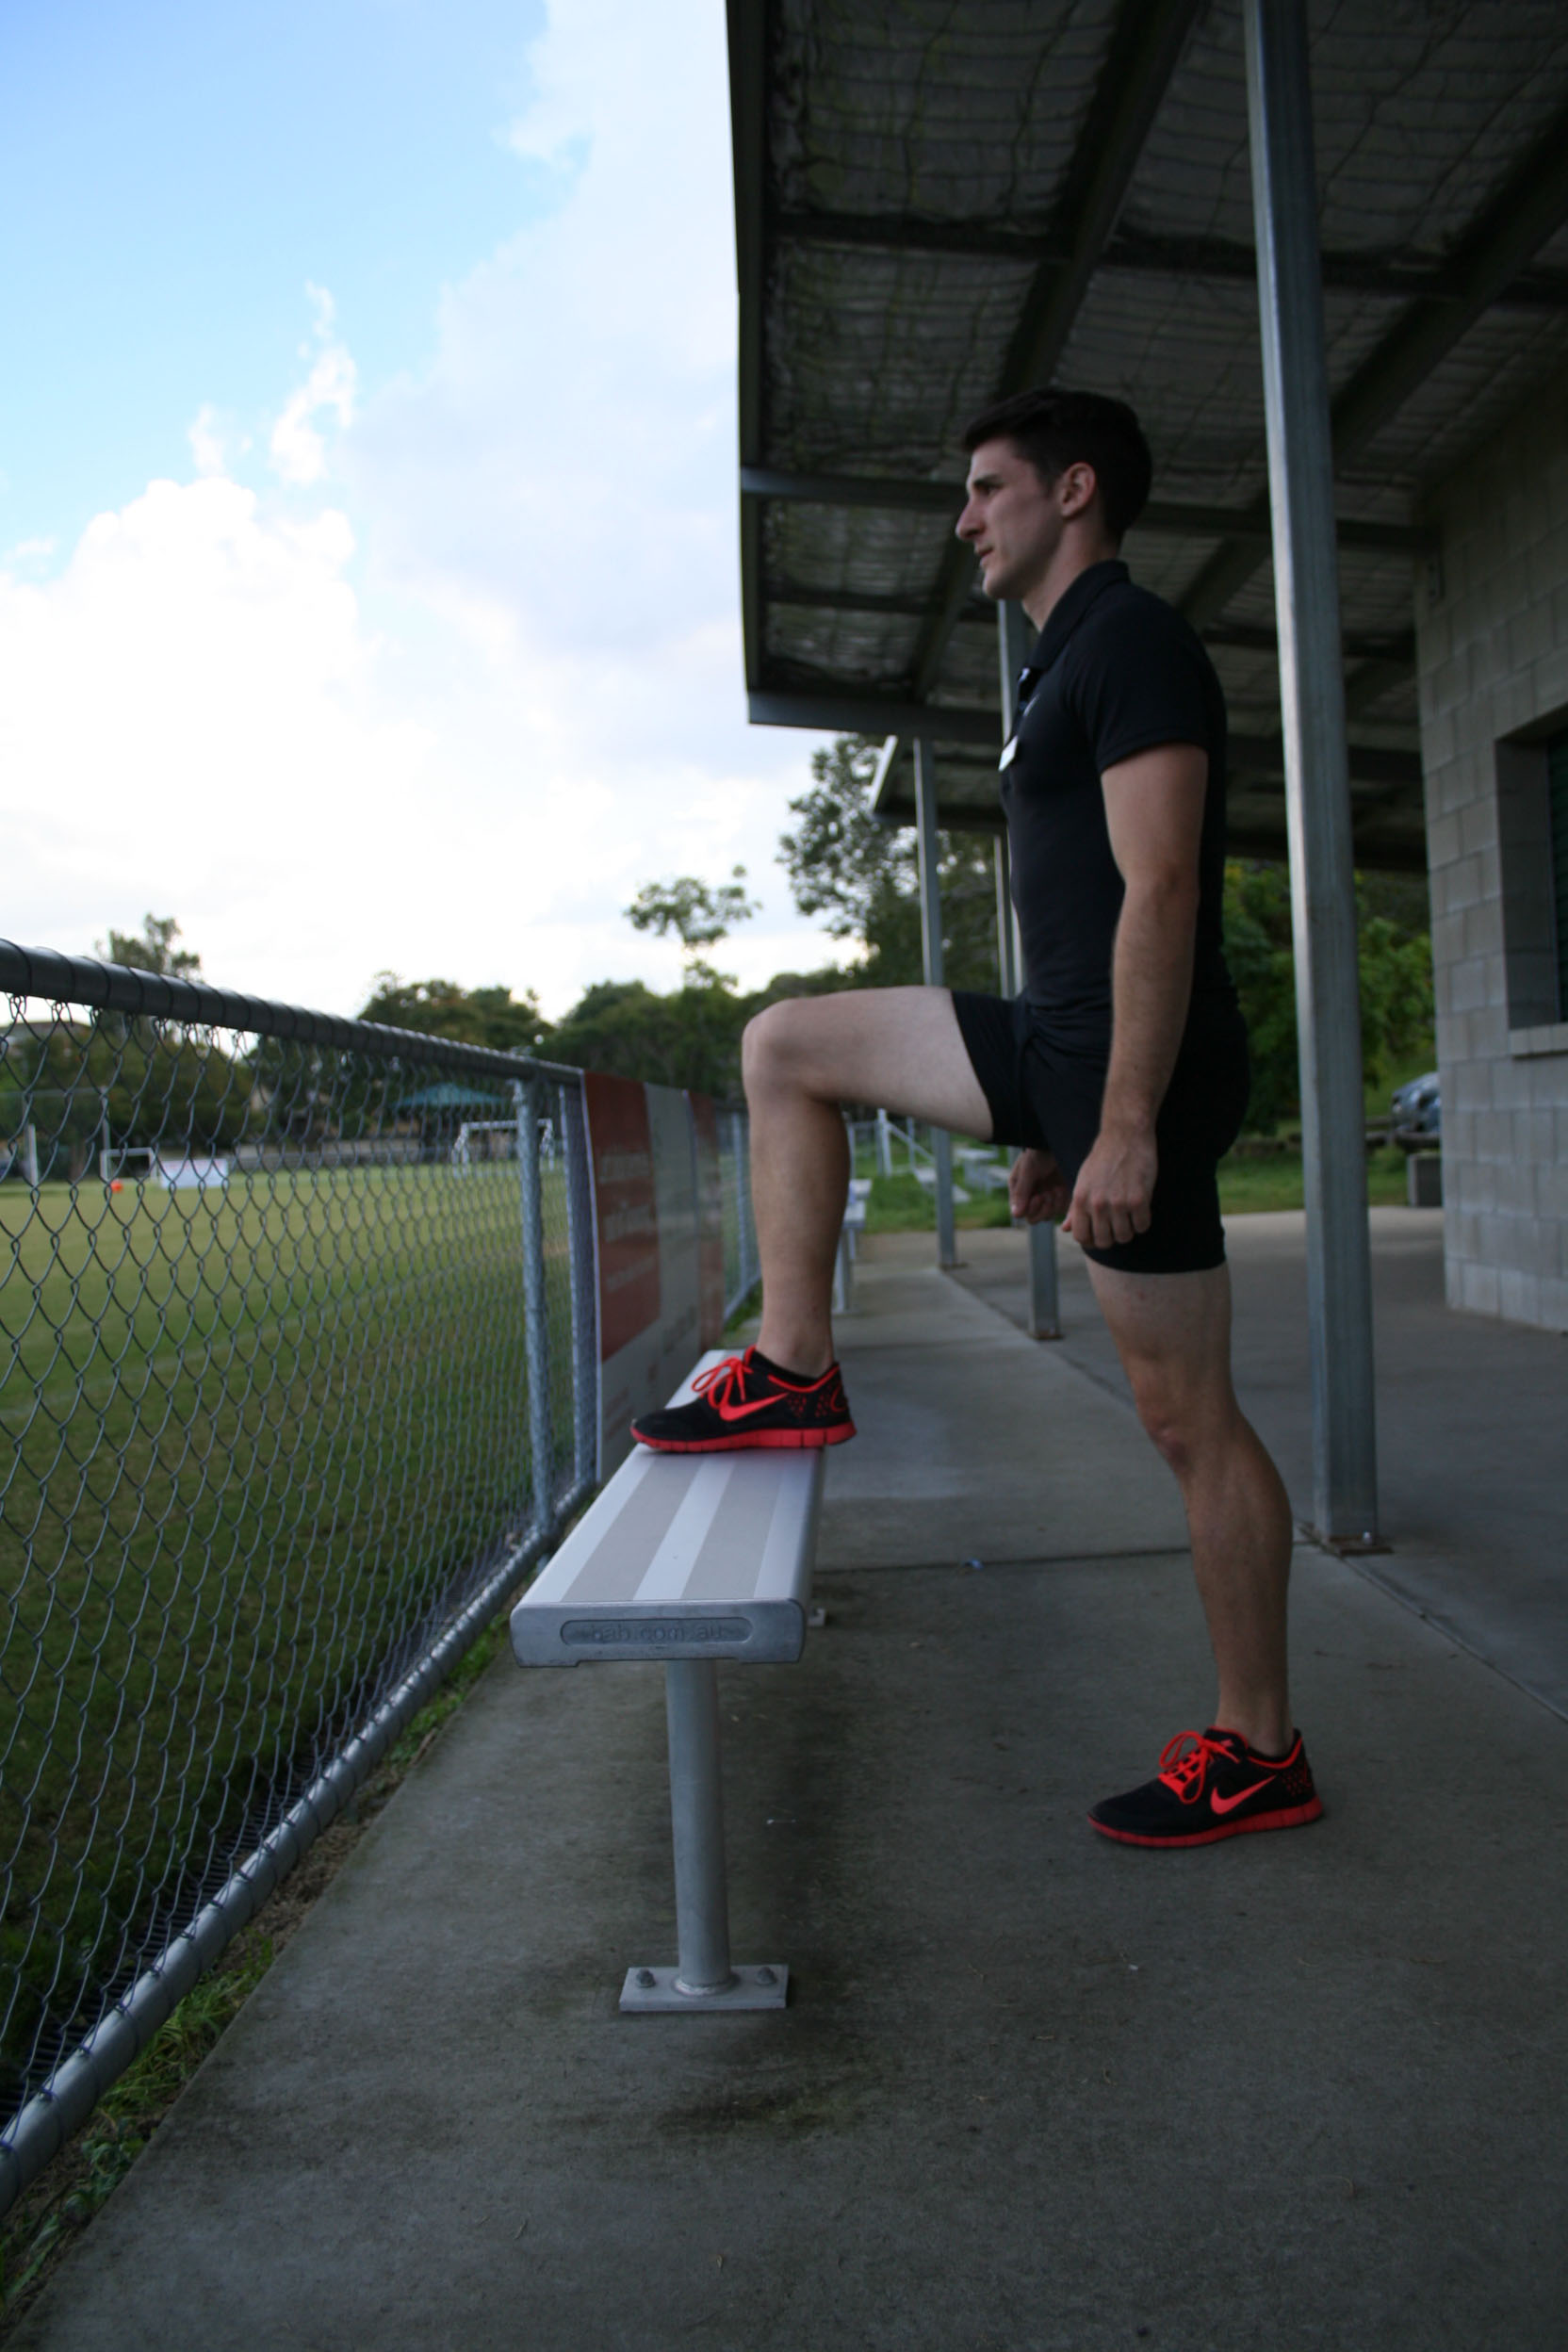
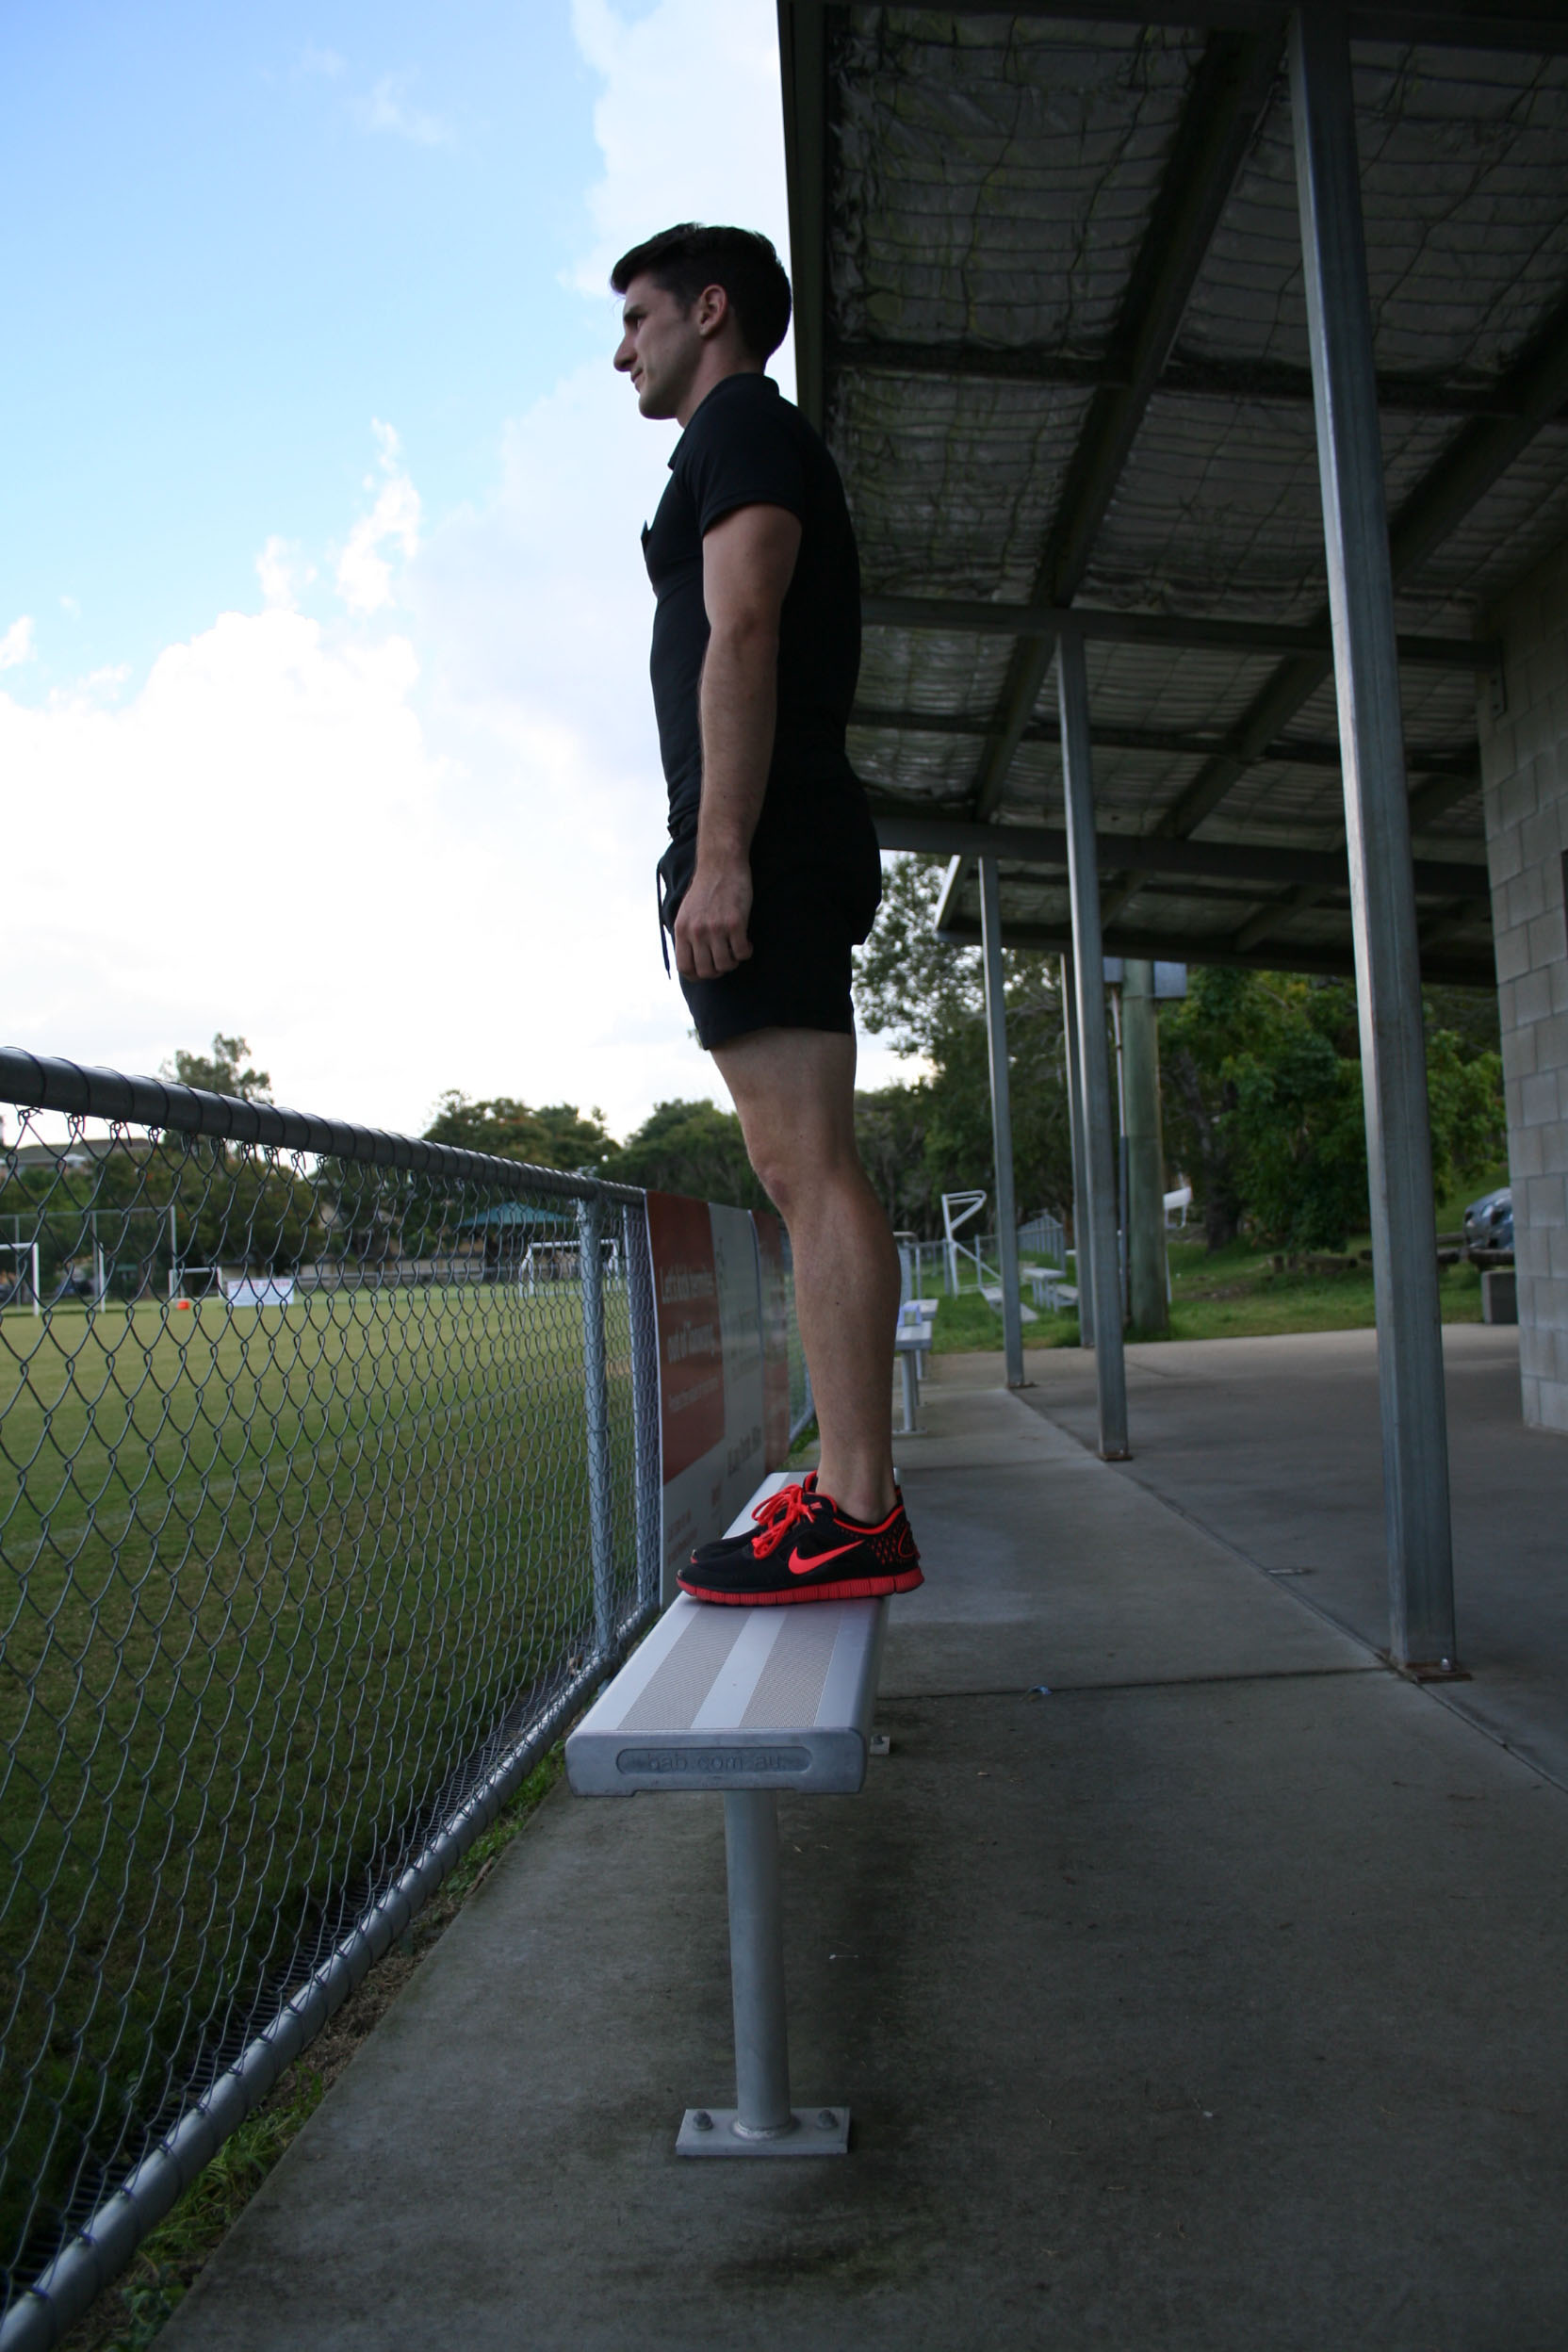
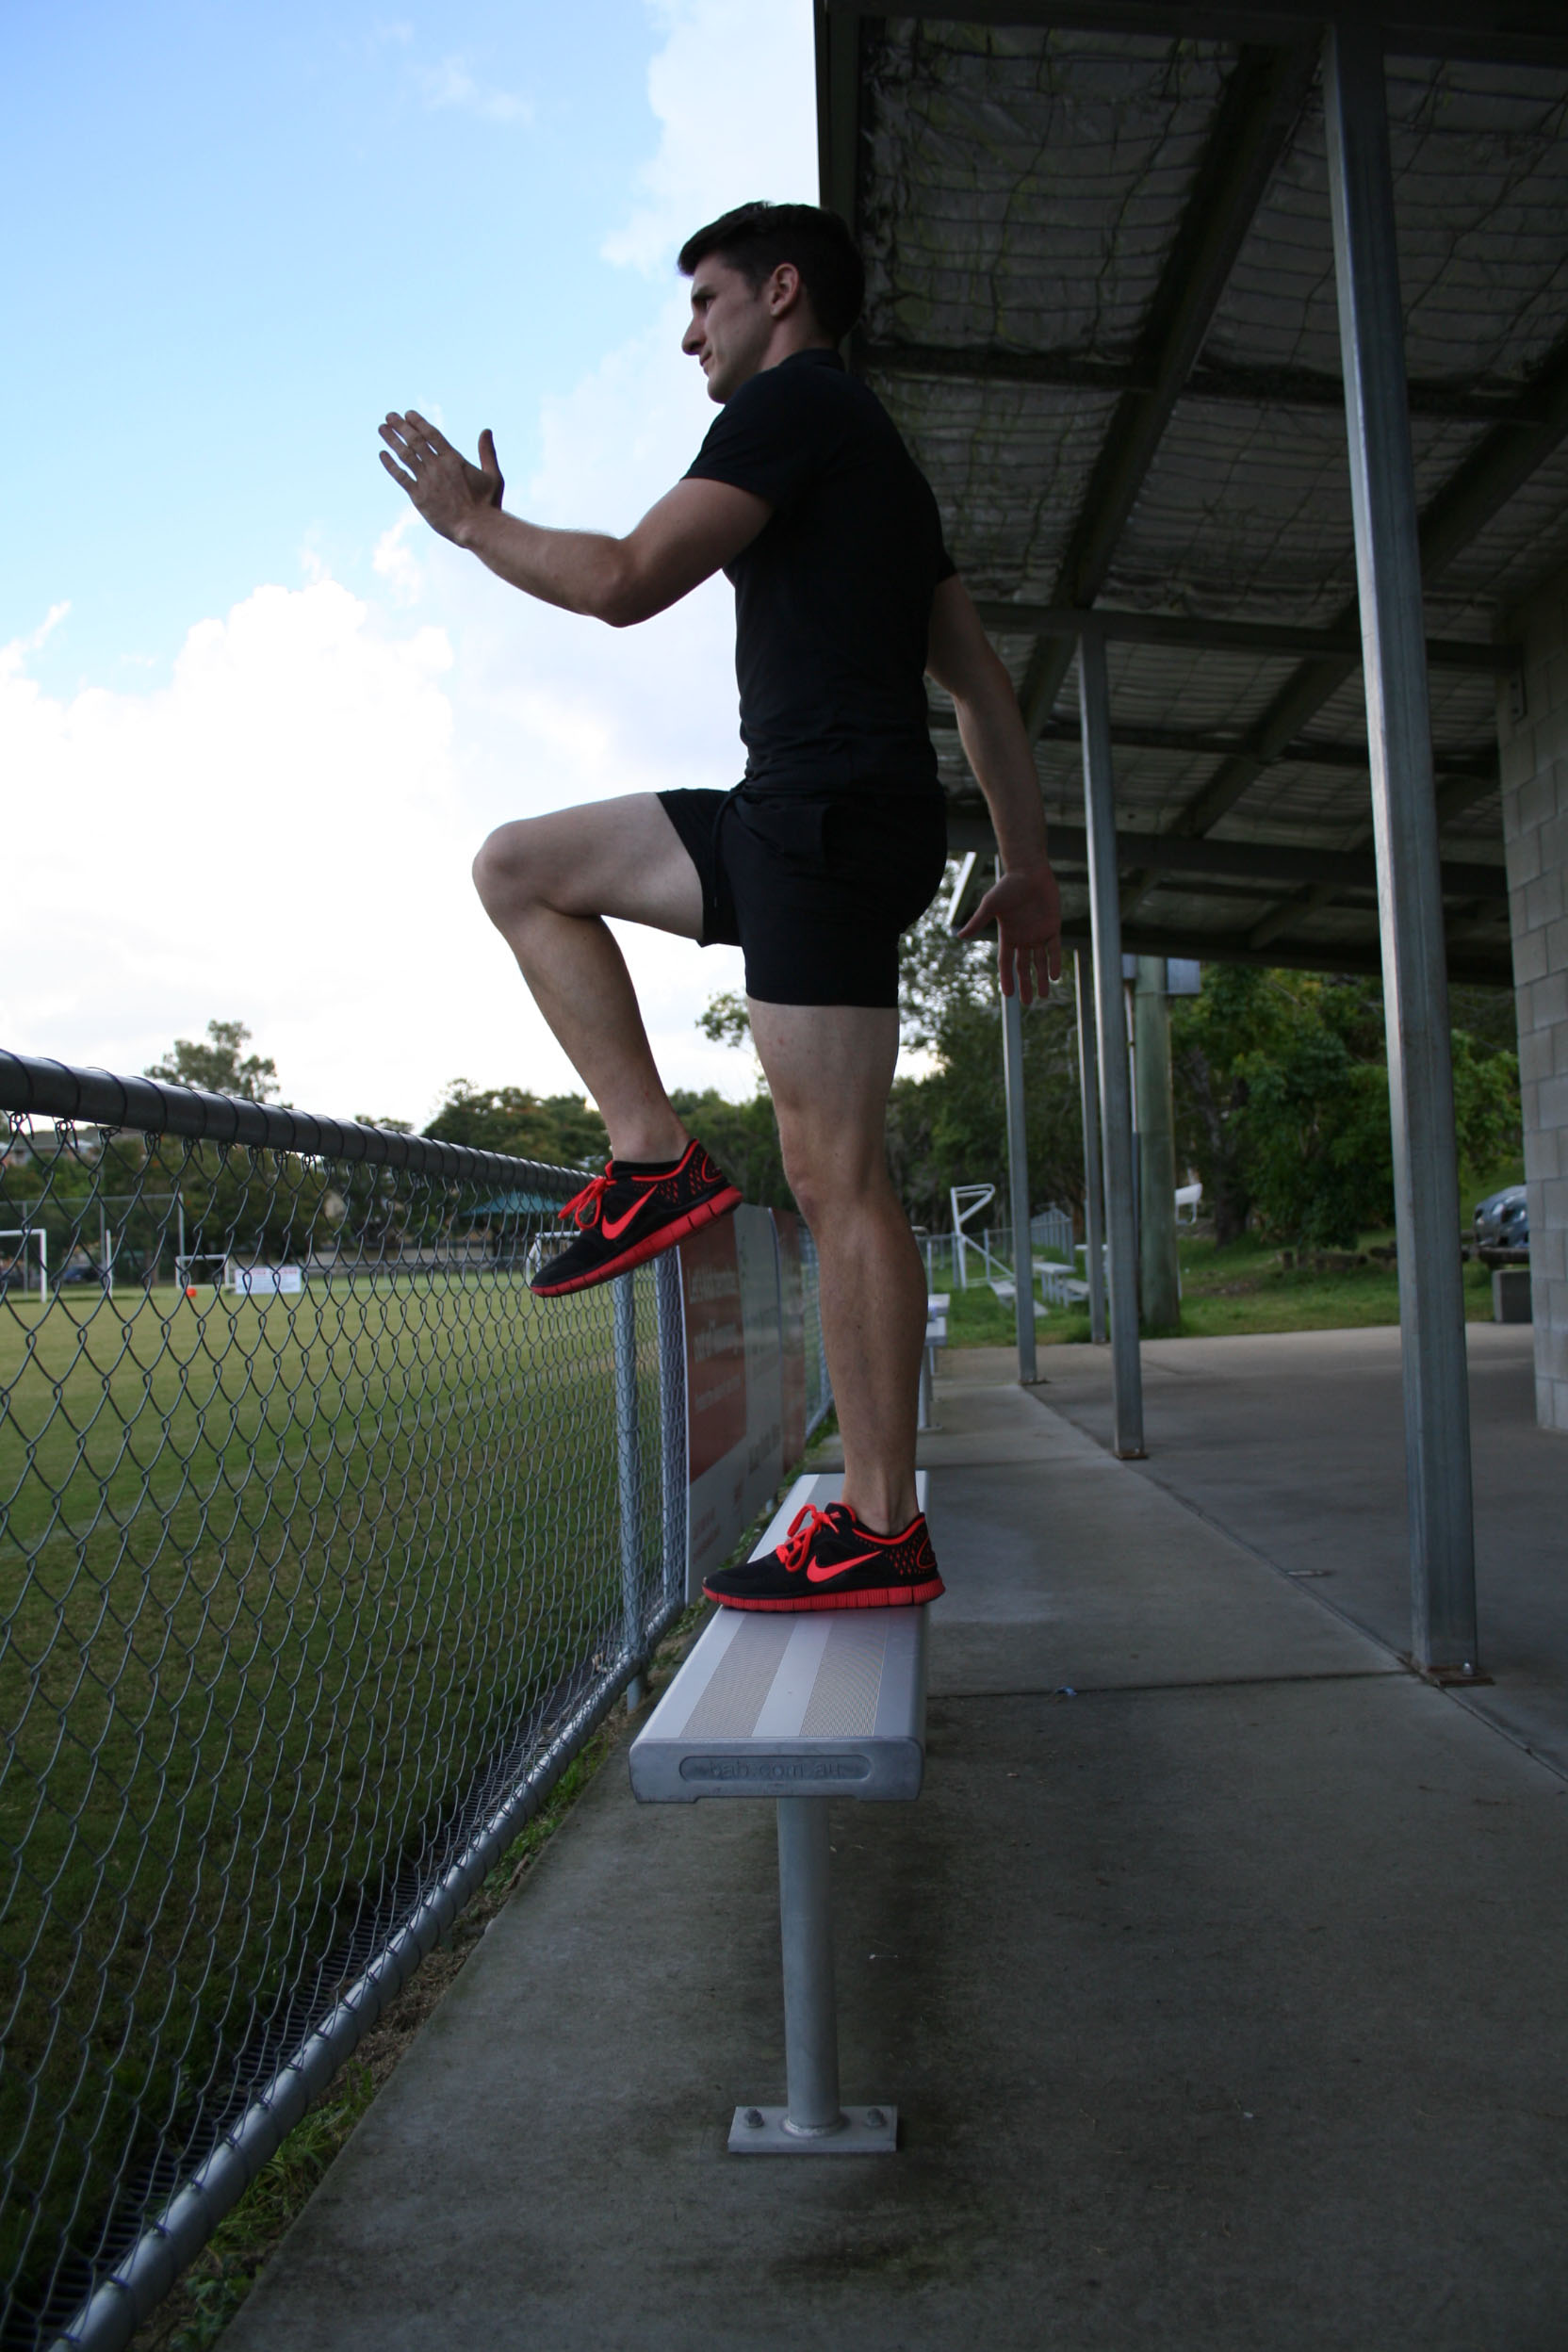
The higher the step the bigger the challenge! Choose a step appropriate to your level. Place the whole foot on the stair, push through your heel and step up. For added balance challenge drive the bottom leg knee up with your arm swing, see picture.
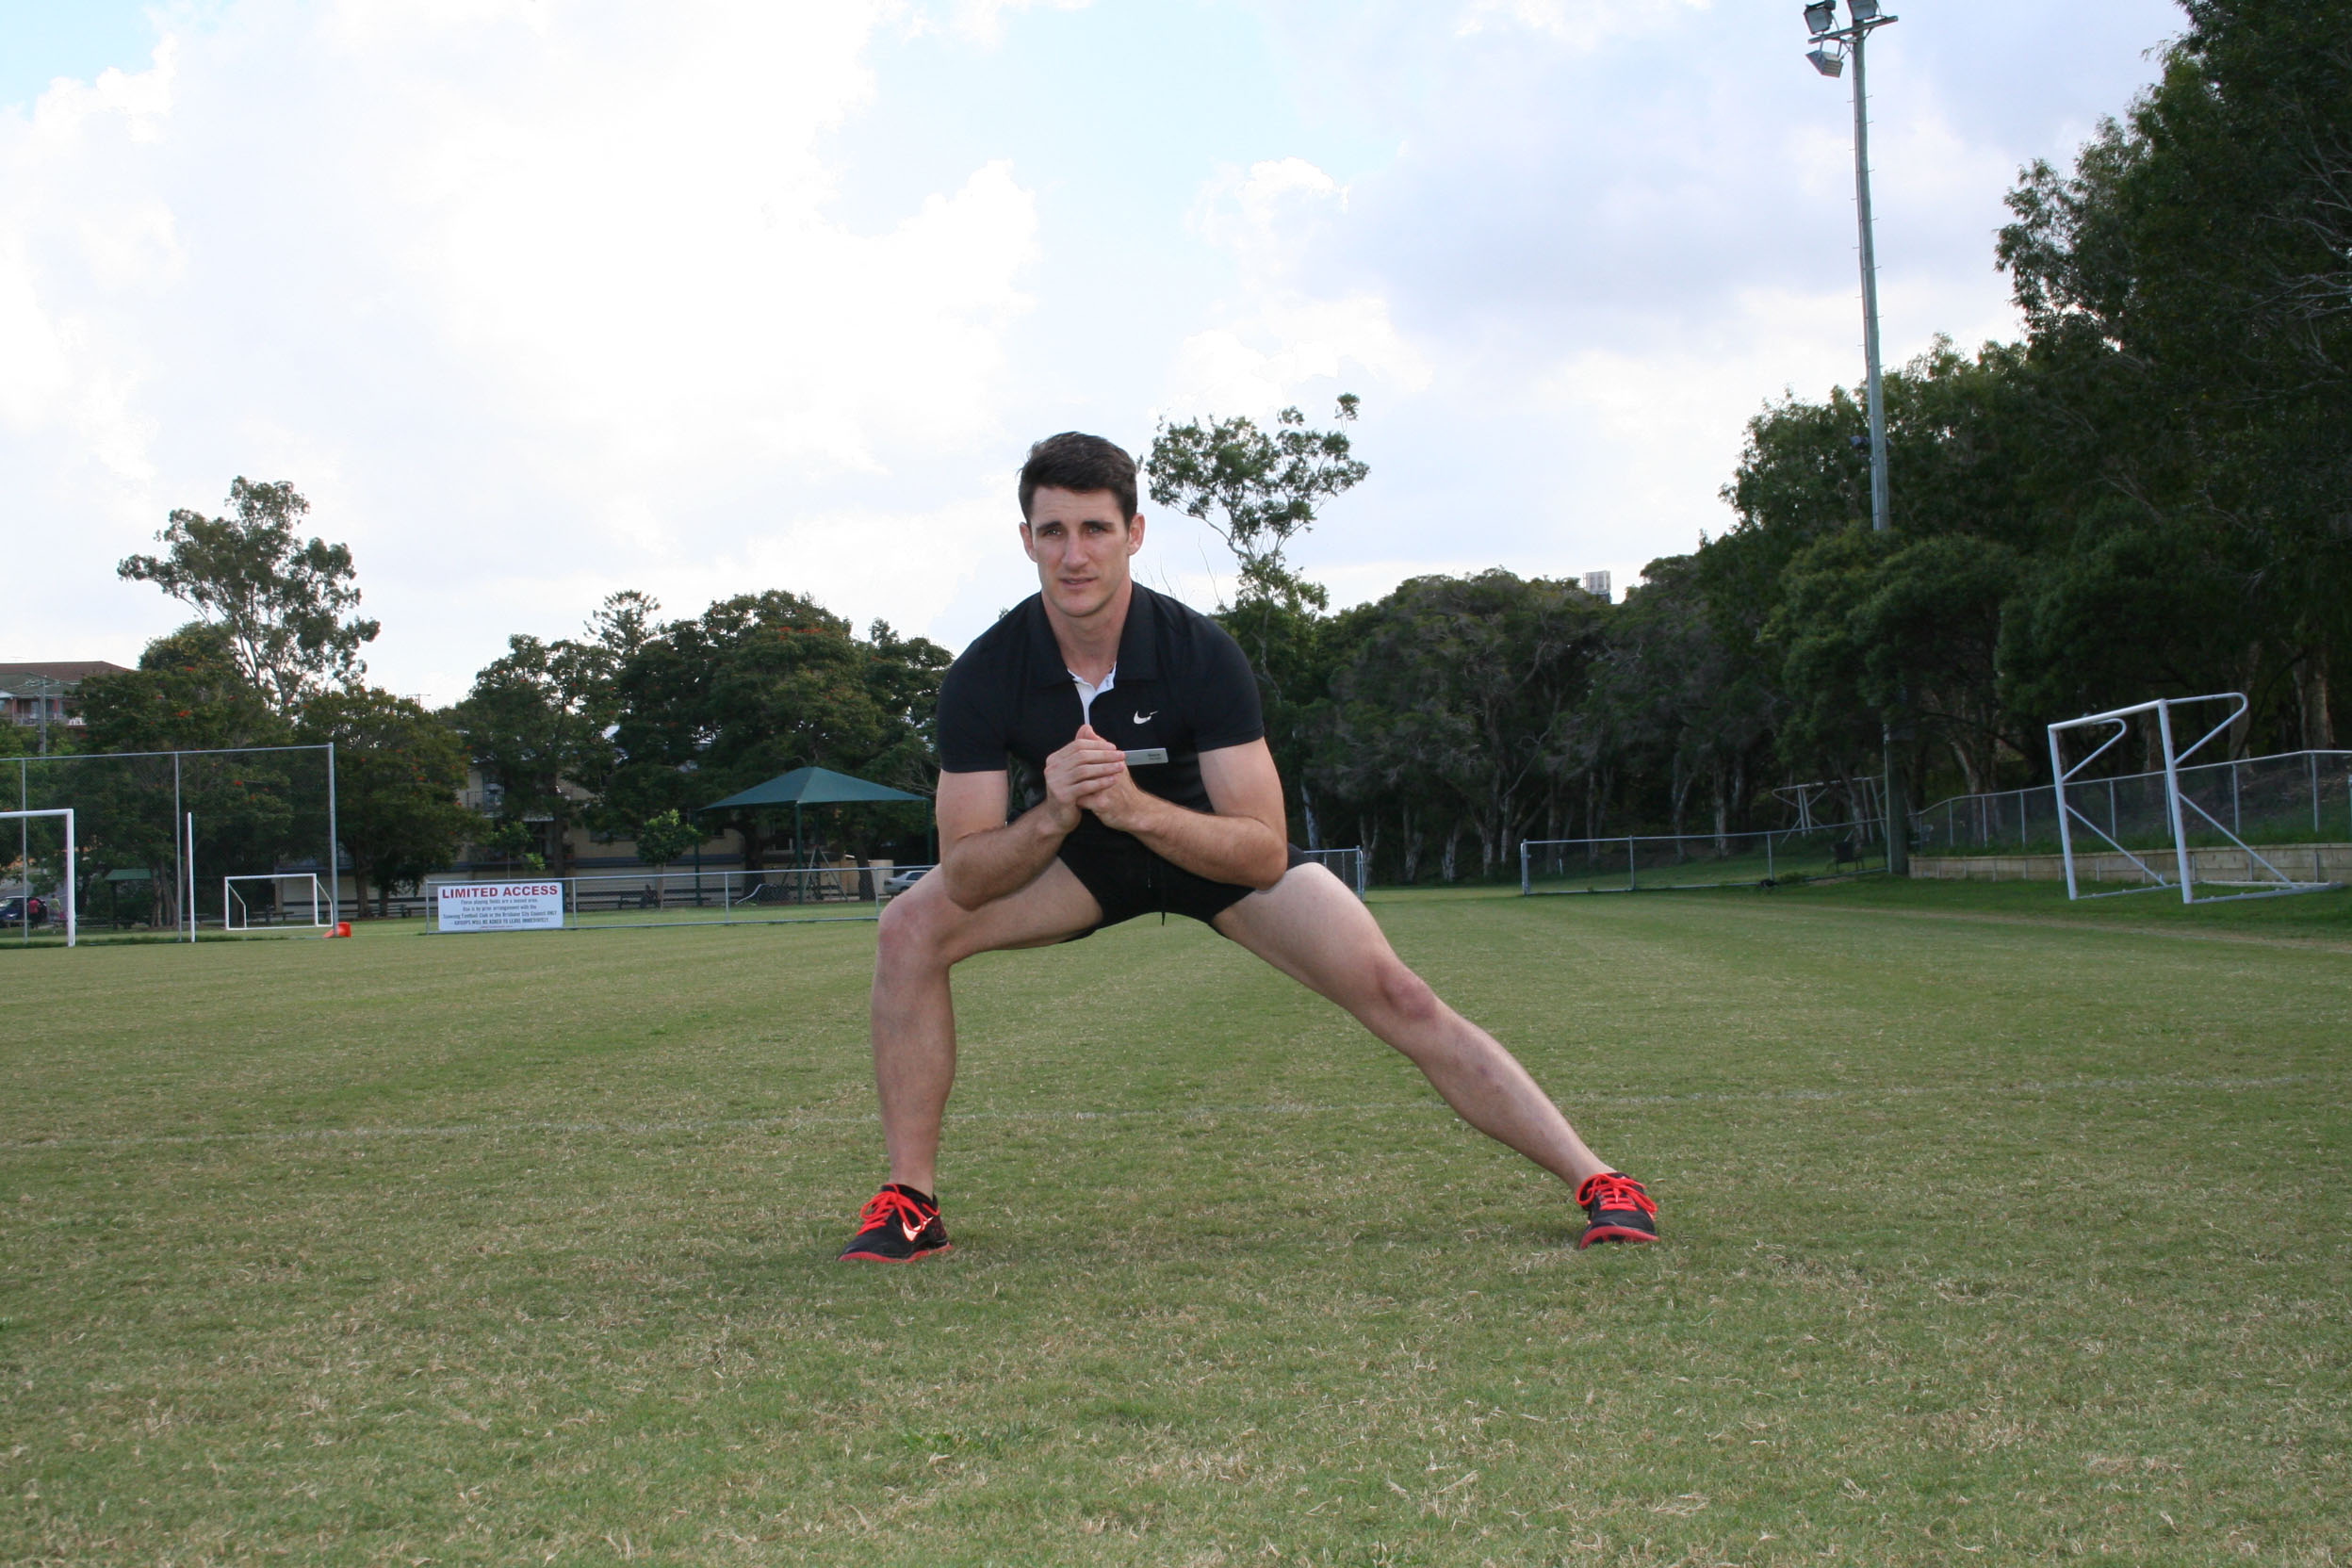
The lunge matrix gets pretty much every muscle in your leg going. Perform a lunge to the front, as you did with the walking lunges. Now instead of moving forward, step back to your grounded foot. Now stepping out to the side and sit back ensuring that the knee doesn’t fall forward over your toes, perform a side lunge.
Once again step back to your grounded foot ready to perform a backward lunge. This is a very similar technique to a forward lunge however, our first move is to step diagonally backwards and perform an action similar to the side squat. These 3 actions combined is the lunge matrix.
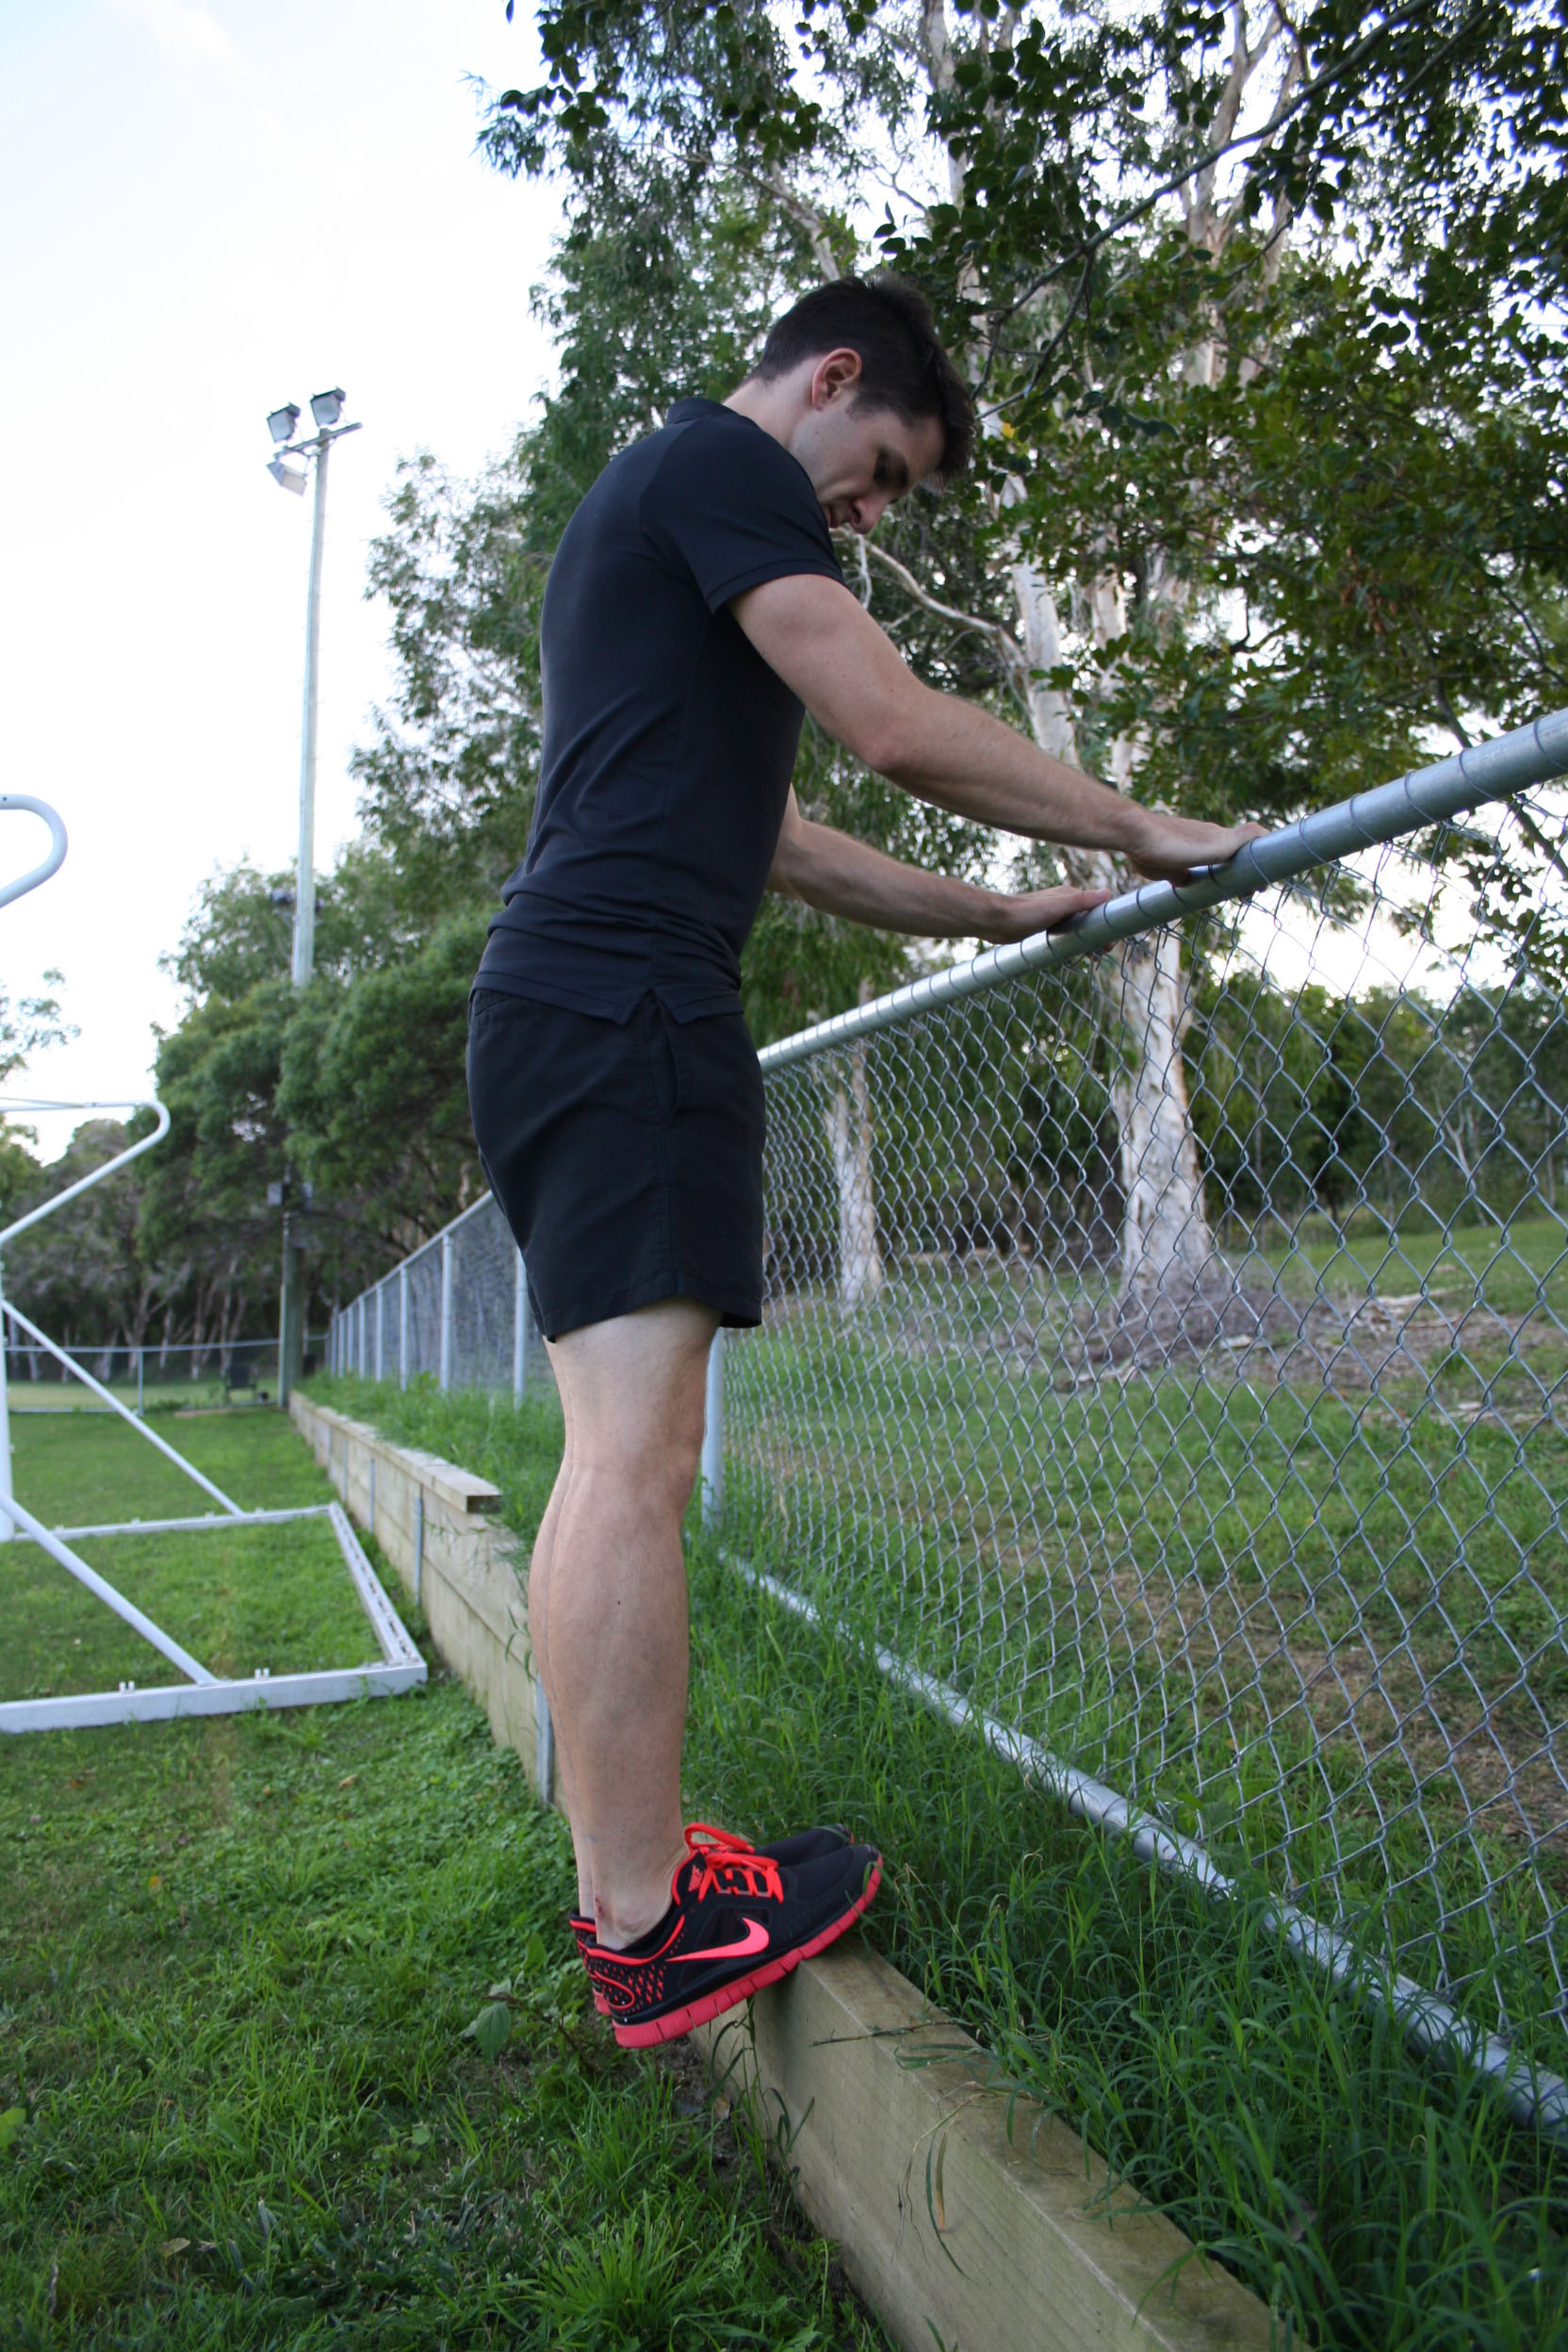
Need an exercise to strengthen your calves? Try calf raises! This is quite a simple exercise that only requires a step or a stair. Stand up on the step using the balls of your feet, the action required is to raise up on your toes elevating your heels up from the step level. The second phase requires you to lower your heels beyond step level.
If you are after a bit more of a challenge, try performing a single leg calf raise.

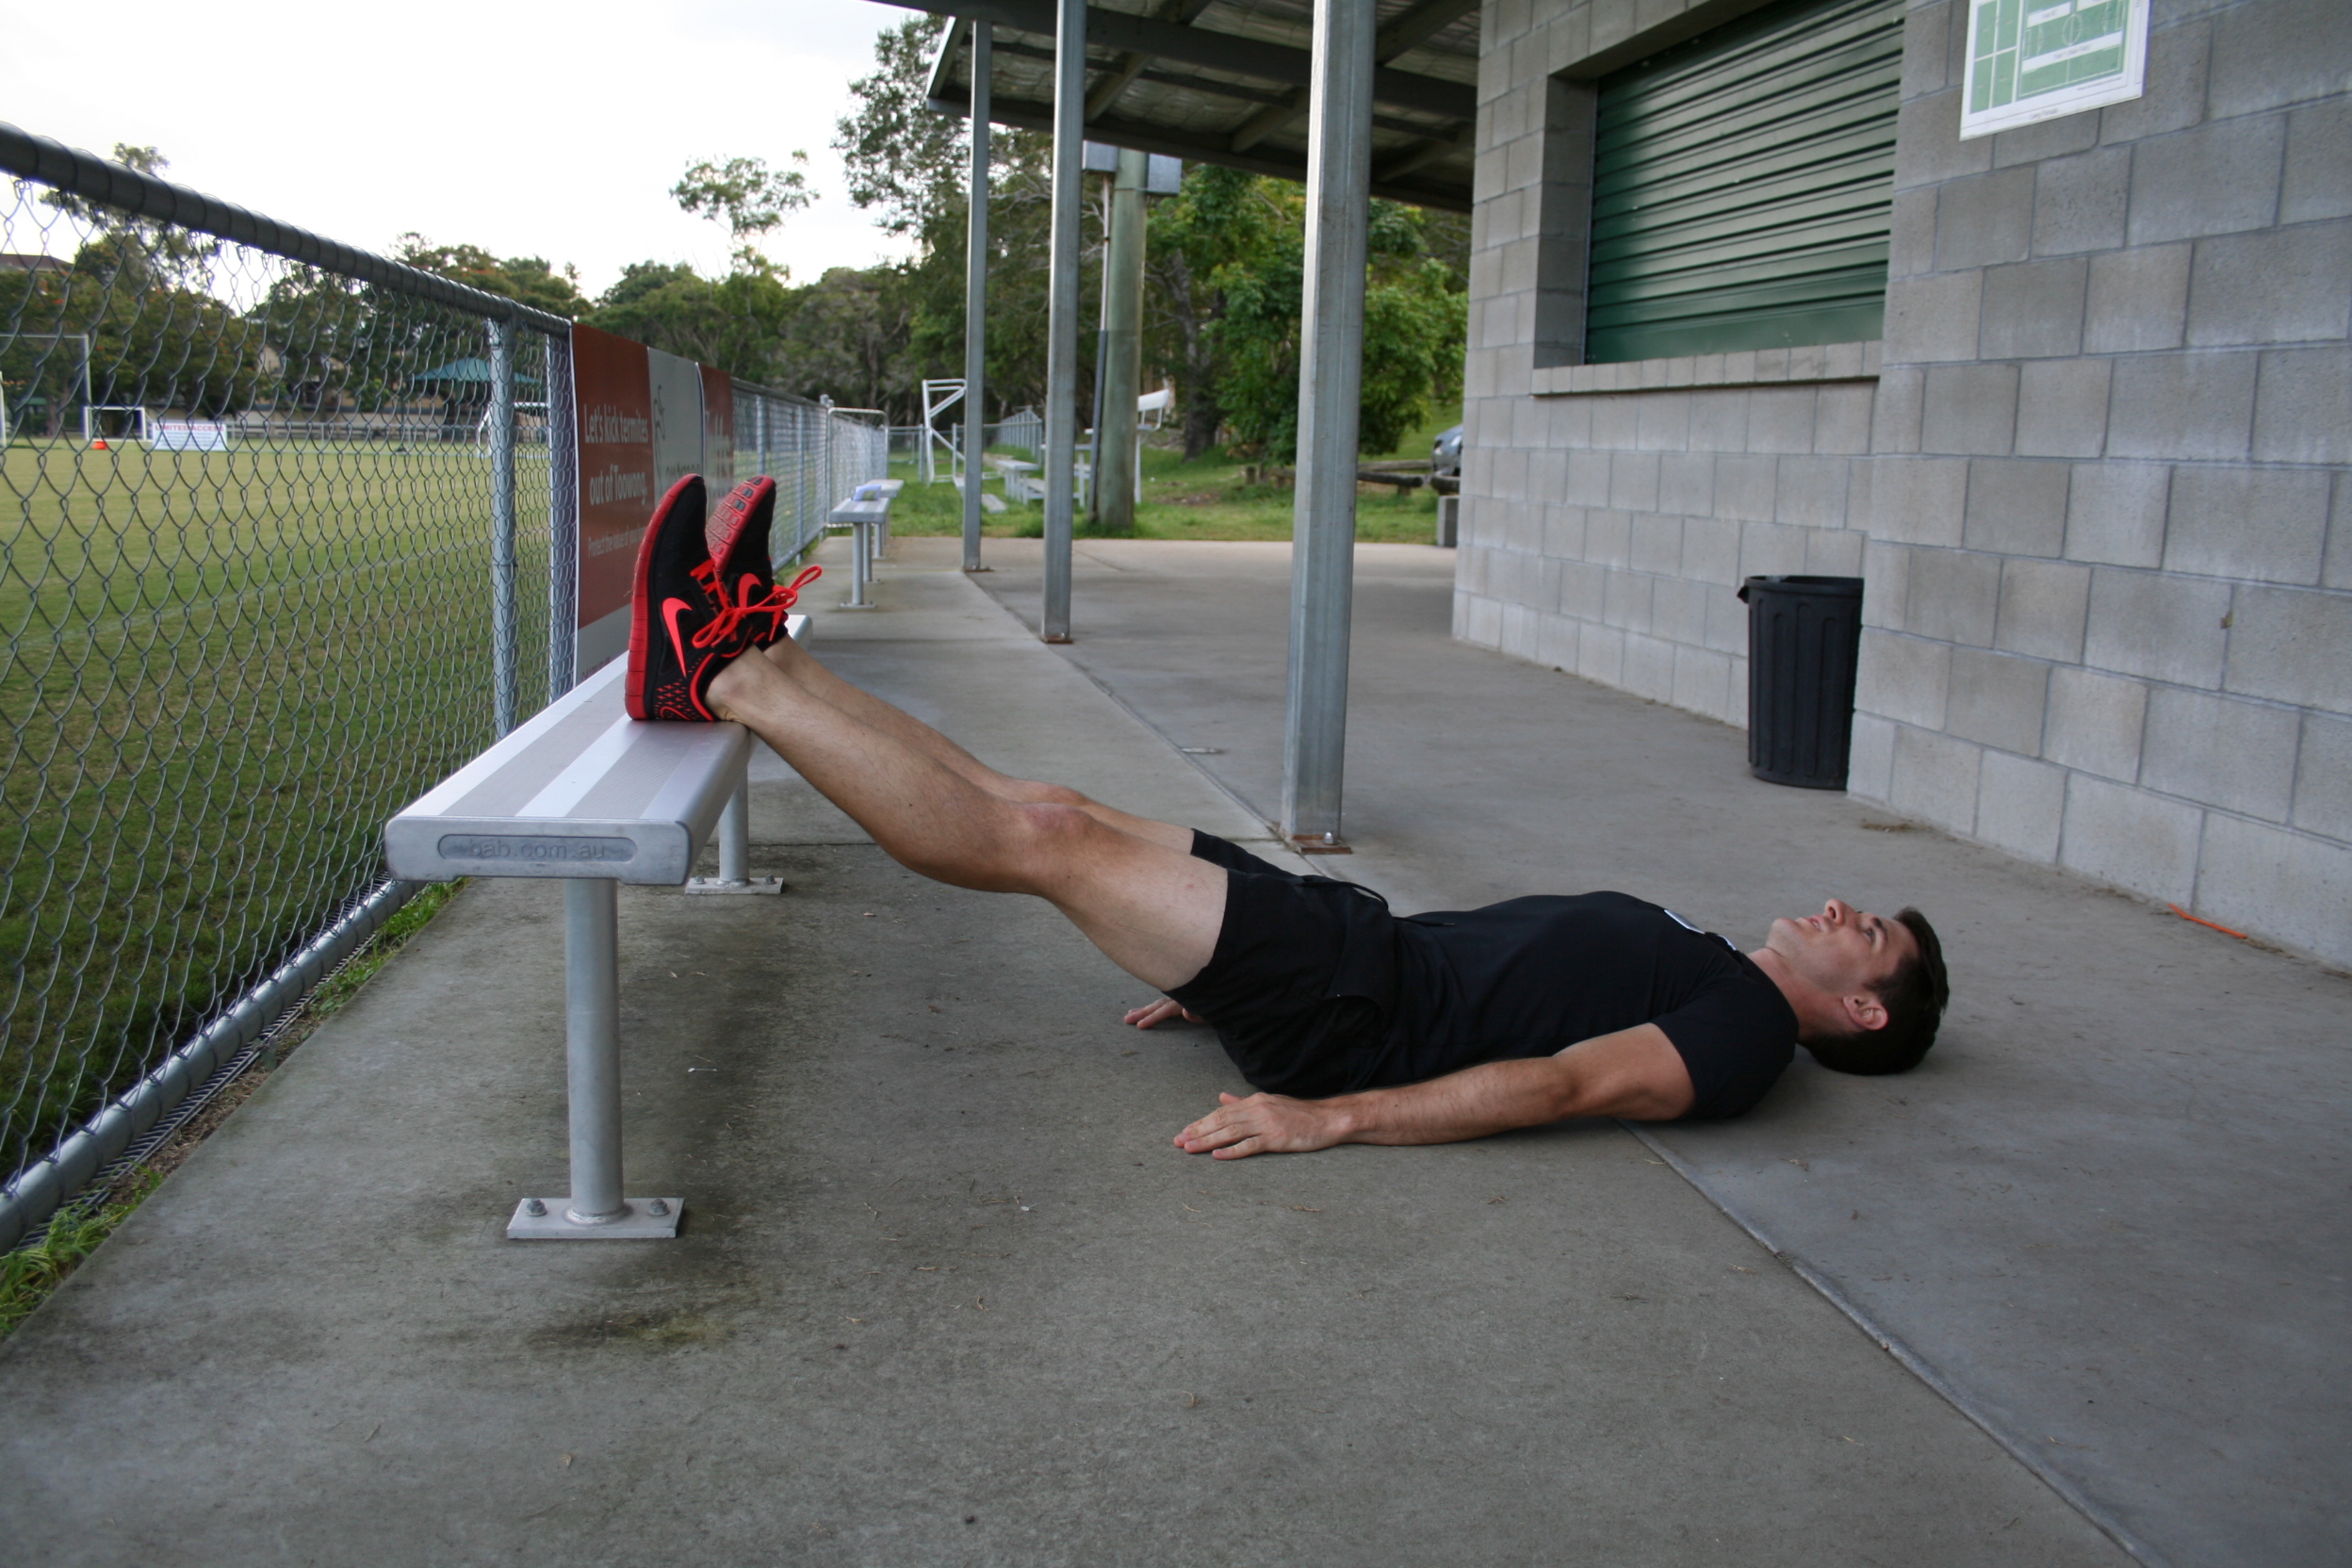
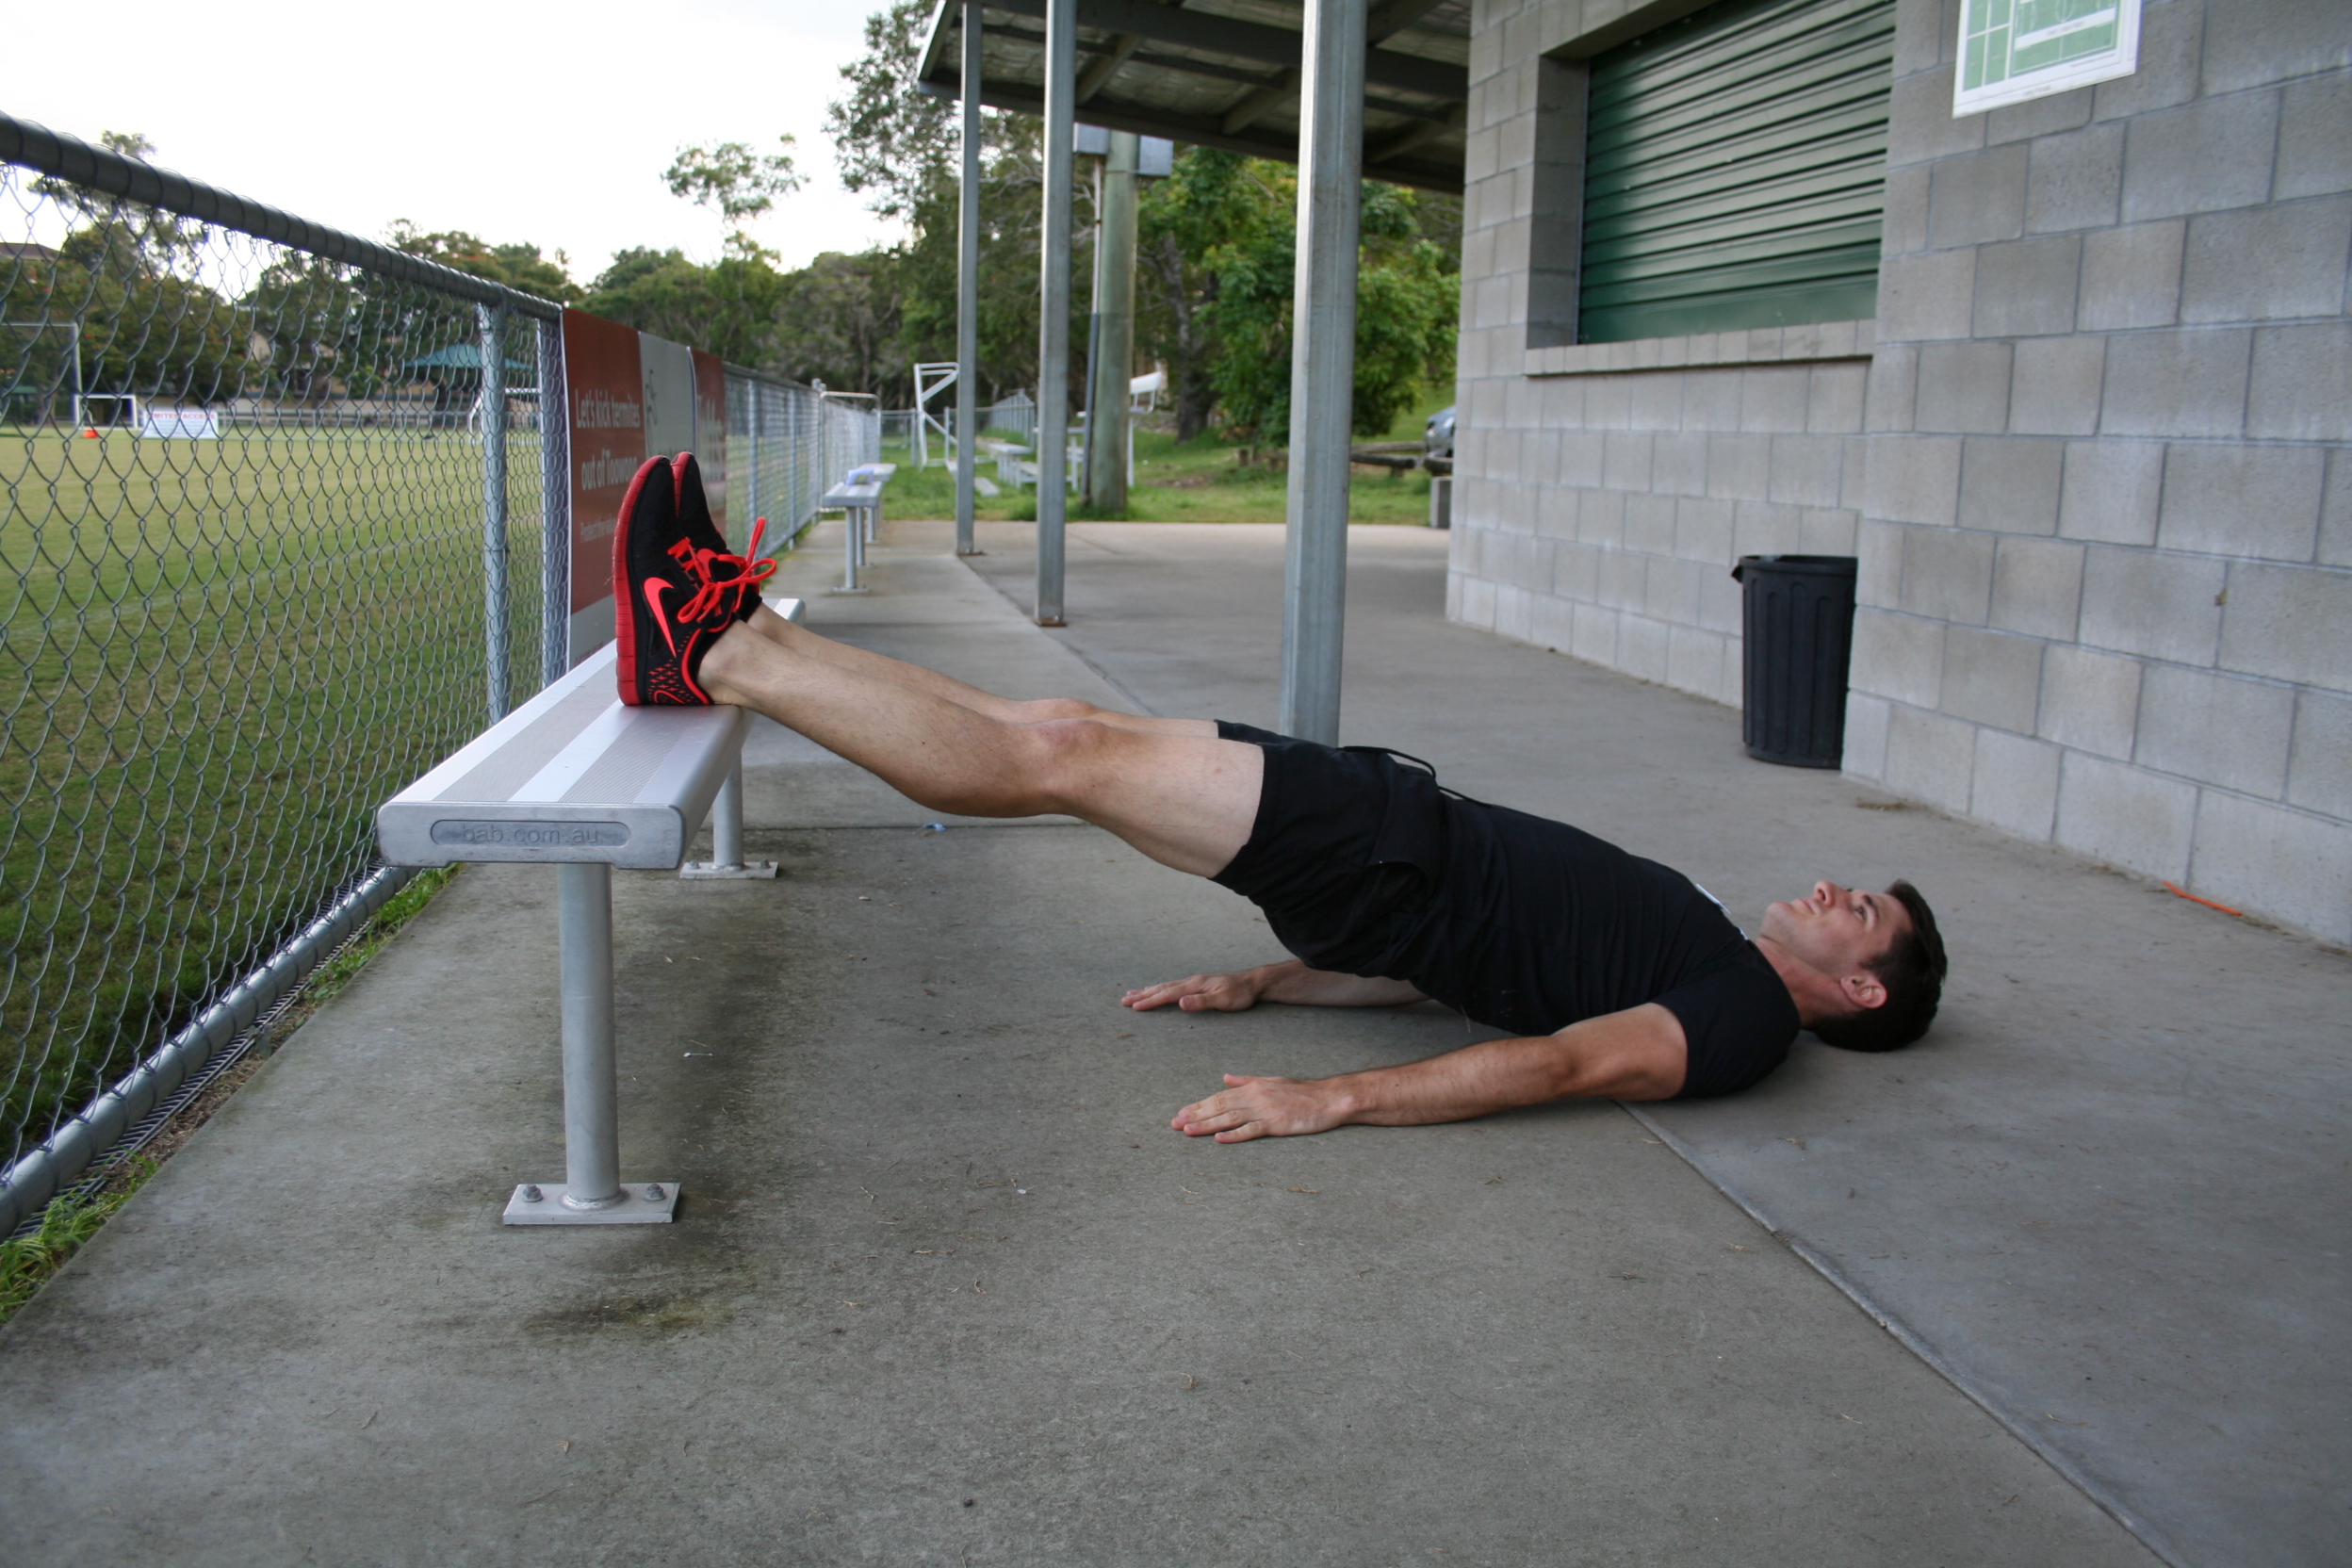
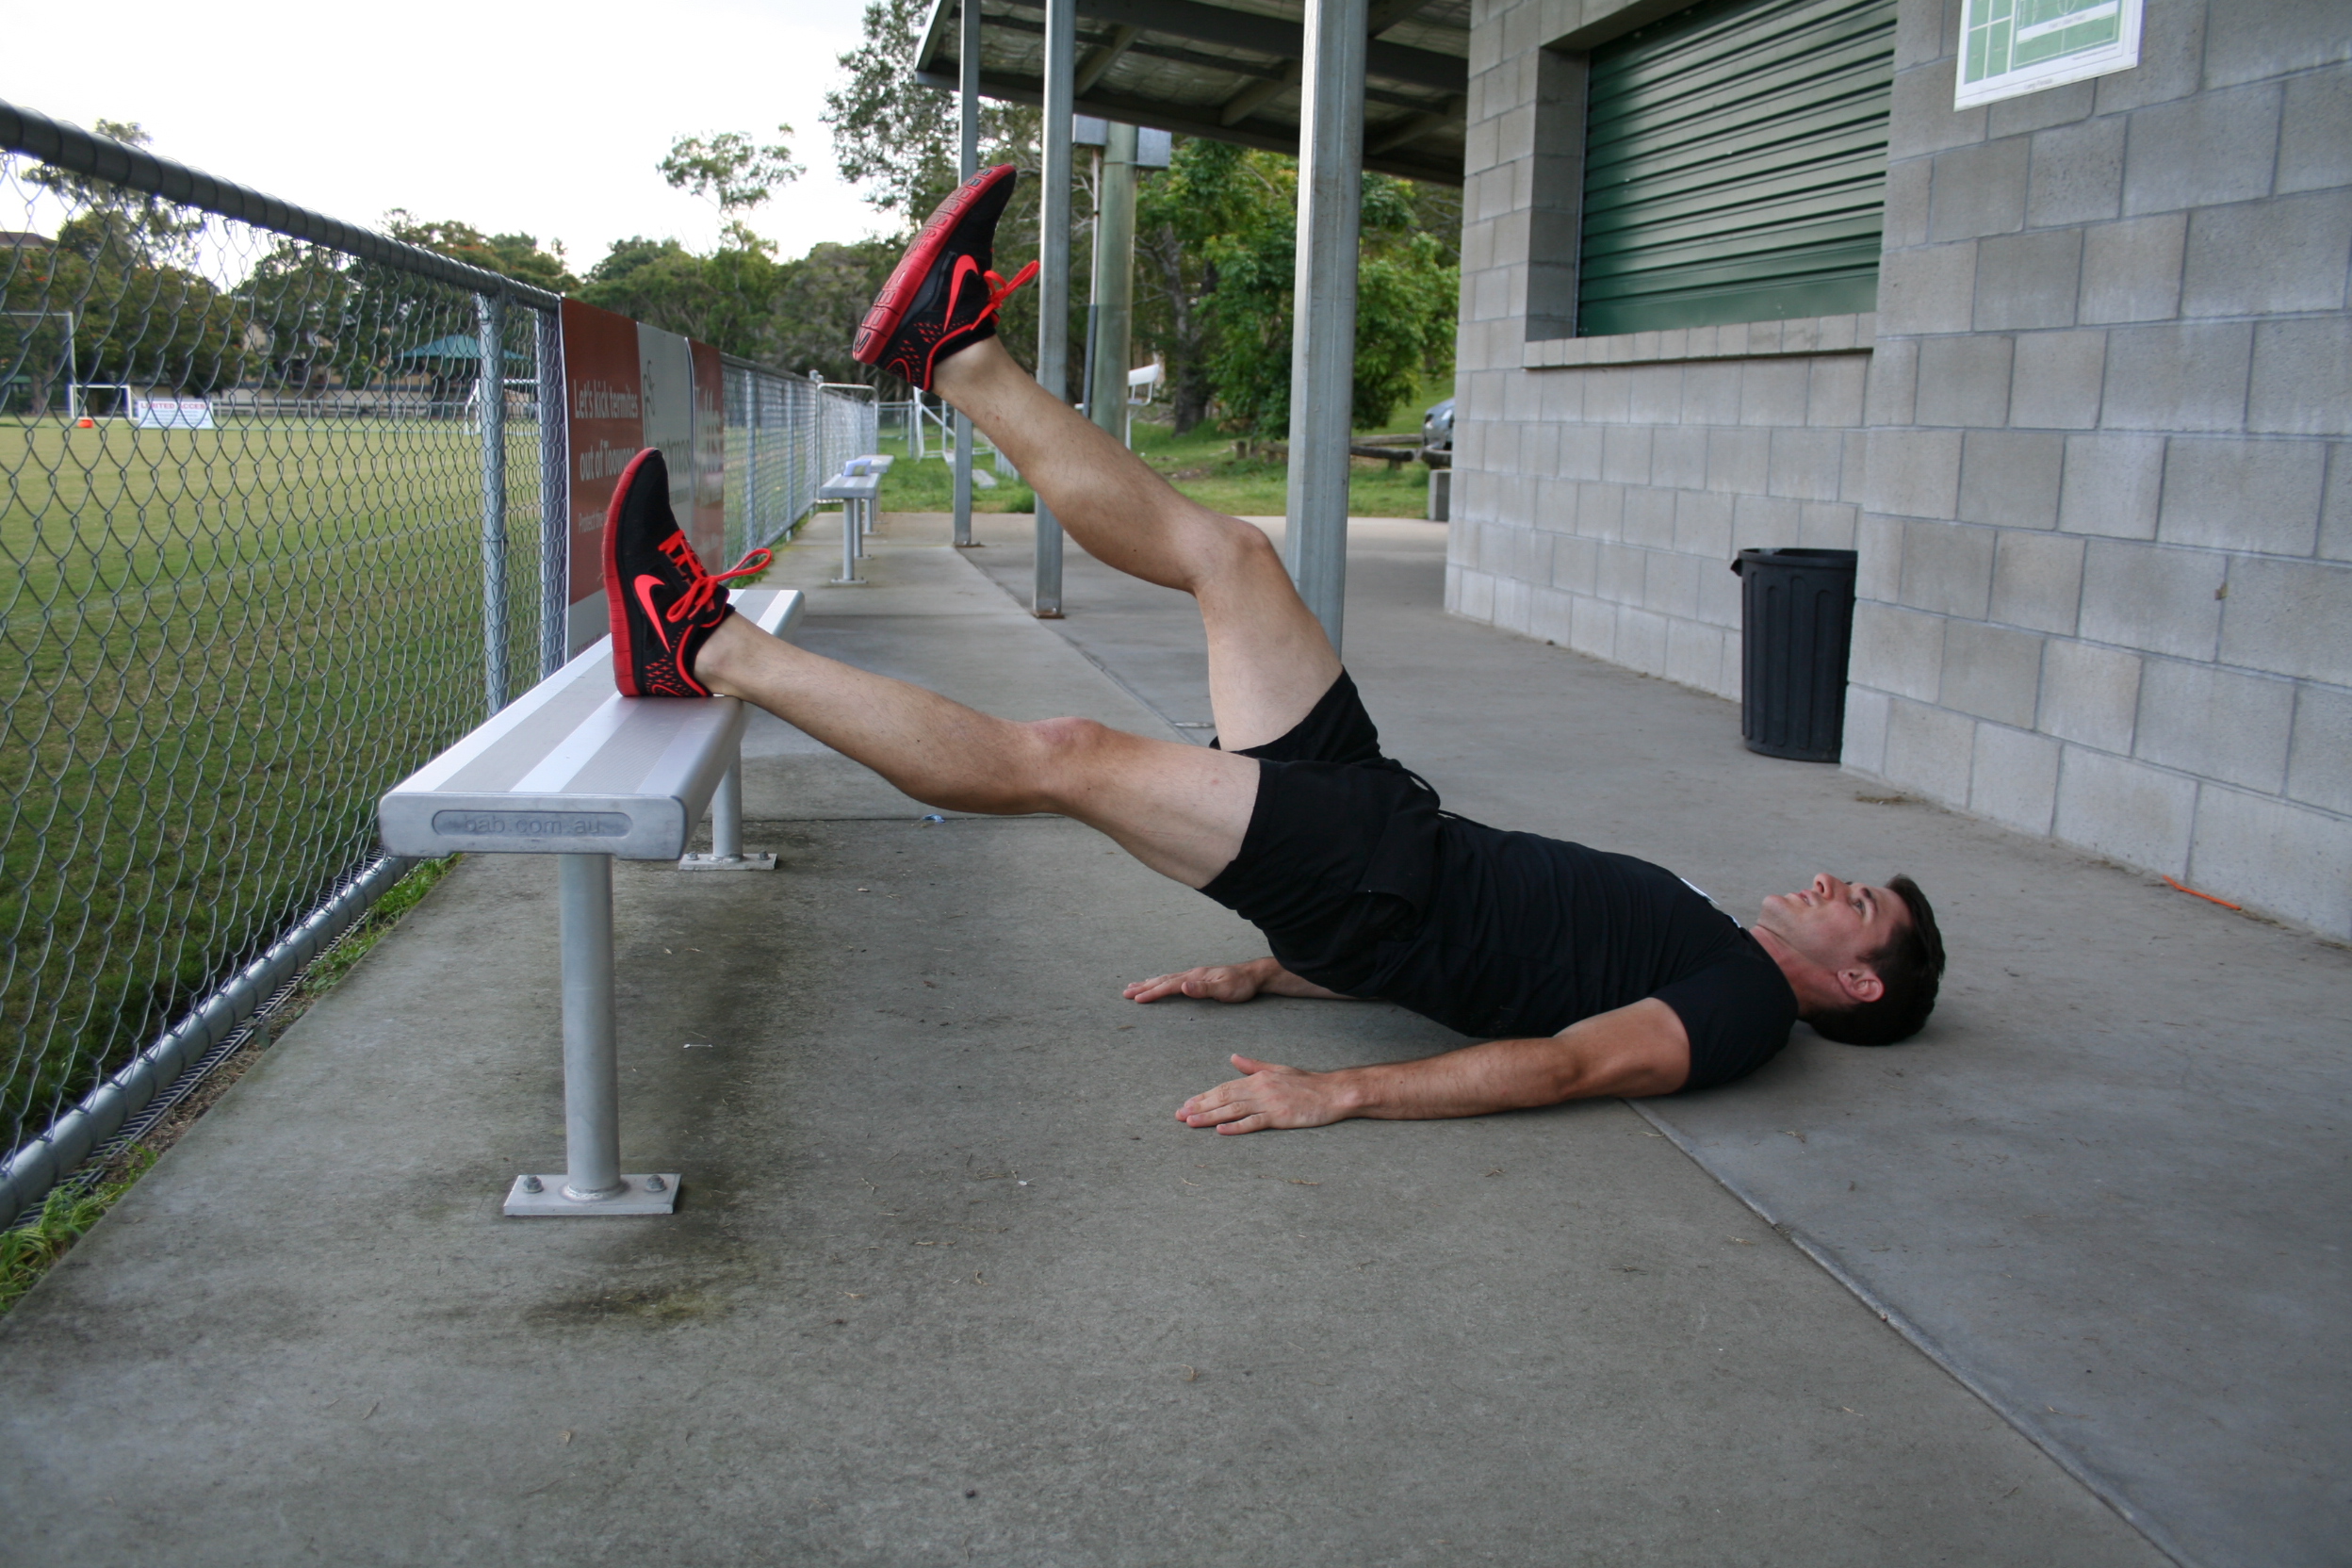
This exercise is very similar to a glute bridge. Start by lying on the ground with your back flat and heels resting on a bench. The action is to raise your hips up into the air from the ground, using your hamstrings to form a straight “bridge” between your shoulders, hips and feet. You should feel a burn down the back of your legs. To add another degree of difficulty, try performing this action on one leg! Additionally for an added degree of difficulty try holding the hips up in the “bridge” position with one leg off the ground in a time based exercise instead of repetitions. See how long you can go for!
Tap to call us at 1800 567 348
Fill in your details below and our team will be in contact shortly to answer your questions and get you started.
"*" indicates required fields